Water leakage from split AC is one of the most stressful AC problems because it feels urgent and visible. You may suddenly notice water dripping from the indoor unit, staining your wall, damaging furniture, or pooling on the floor. In many cases, leakage is not caused by major component failure but by drainage issues, airflow problems, or maintenance gaps. Acting quickly and understanding the real cause can minimize damage, reduce repair cost, and prevent the same issue from returning.
Table of Contents
ToggleImmediate Action Steps to Minimize Damage
When you see water leakage from your split AC, the first goal is not repair. The first goal is protection. Quick action can prevent electrical damage, mold growth, and costly interior repairs.
1. Turn the Unit Off Immediately
Switch off the AC from the remote and then from the main power supply. Continuing to run the system while water is leaking can worsen internal overflow, damage electrical parts, and increase the amount of water spreading.
2. Protect Surrounding Furniture and Electronics
Move furniture, carpets, and electronics away from the leaking area. If water is dripping from the indoor unit, place a container underneath temporarily to control spread. Use dry towels to prevent water from reaching power sockets or extension cables.
3. Check If Leakage Is Continuous or Dripping After Shutdown
After turning off the unit, observe whether water continues to drip. If it slows down and stops, the issue is likely related to drainage overflow. If dripping continues heavily, there may be trapped water in the internal tray or a damaged component.
In most residential cases, water leakage from split AC is linked to drainage blockage, improper leveling, or airflow restriction — not a broken compressor or expensive part failure.
Understanding Why Split AC Units Leak Water
A split AC removes humidity from indoor air. Moisture condenses on the evaporator coil and collects in a drain tray. From there, it flows through a drain pipe to the outside.
Leakage happens when this drainage path is interrupted. The most common causes are:
- Blocked drain pipe
- Dirty air filter causing coil freezing
- Improper indoor unit leveling
- Damaged drain tray
- Condensate pump malfunction (if installed)
Understanding this simple flow — condensation → tray → pipe → outside — helps you logically identify where the interruption might be.
Structured Diagnostic Checklist (From Simple to Complex)
Below is a practical diagnostic checklist ranked from the simplest and most common causes to more complex issues. Follow the steps in order instead of jumping to conclusions.
Step 1: Inspect the Air Filter
Dirty air filters are one of the most overlooked causes of water leakage from split AC systems. When filters are clogged:
- Airflow is restricted
- The evaporator coil becomes too cold
- Ice forms on the coil
- Ice melts excessively when the unit cycles off
- Water overwhelms the drain tray
Action: Remove and clean the filter using water. Let it dry completely before reinstalling. If heavily damaged, replace it.
Step 2: Check for Coil Freezing
If you previously noticed weak airflow or reduced cooling before leakage started, coil freezing may be involved.
Signs of frozen coils include:
- Ice visible behind the front panel
- Reduced airflow
- Sudden water dripping after AC shutdown
If freezing is observed repeatedly even with clean filters, refrigerant imbalance may be the cause. This requires professional inspection.
Step 3: Inspect Indoor Unit Leveling
Split AC indoor units must be slightly tilted toward the drain outlet side. If installation is not properly leveled, water may pool and overflow from the wrong edge.
Action: Visually inspect whether the unit appears tilted forward or backward. Installation adjustment usually requires a technician.
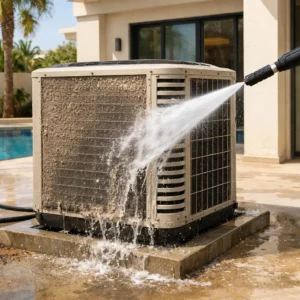
Step 4: Check the Drain Pipe for Blockage
The most common cause of water leakage from split AC is a blocked drain pipe. Dust, debris, and microbial buildup accumulate over time.
Symptoms include:
- Continuous dripping during operation
- Water stains near the indoor unit
- Musty smell from AC
DIY Drain Line Clearing Using Suction
If you are comfortable performing light DIY steps, you can attempt basic drain clearing:
- Locate the external drain pipe outlet
- Use a wet/dry vacuum to apply suction
- Remove debris buildup
This suction method often clears minor blockages without dismantling the indoor unit.
Preventive Flushing Method
To reduce internal buildup, periodic flushing of the drain line using clean water or mild cleaning solution can help prevent future blockages. This should be done carefully to avoid backflow into the unit.
Step 5: Inspect the Drain Tray
If leakage continues despite clear drainage, the internal drain tray may be cracked or misaligned. This component collects condensation before channeling it into the pipe.
Cracked trays allow water to escape before reaching the drain line. This typically requires part replacement.
Step 6: Check for Refrigerant-Related Issues
Refrigerant imbalance can cause excessive coil freezing, leading to repeated melting and overflow. Unlike simple filter issues, this is not a safe DIY repair.
Signs include:
- Persistent icing even after cleaning filters
- Reduced cooling performance
- Higher electricity consumption
This condition requires professional inspection and pressure testing.
Step 7: Evaluate Condensate Pump (If Installed)
Some systems use a condensate pump to move water upward. If this pump fails:
- Water backs up into the tray
- Leakage occurs indoors
Pump malfunction typically needs professional repair or replacement.
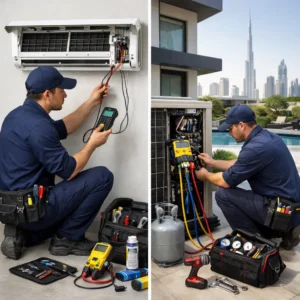
When Professional Assistance Is Required
While many drainage issues are manageable, certain conditions clearly require professional help:
- Repeated refrigerant-related icing
- Damaged internal drain trays
- Electrical components exposed to water
- Condensate pump failure
- Persistent leakage despite cleaning efforts
Instead of listing exact costs without inspection, professional services typically determine pricing based on repair category. Minor drainage cleaning falls into basic service ranges, while tray replacement or refrigerant-related correction may fall under moderate or comprehensive repair categories.
For updated and transparent pricing references, you can check our pricing page, where service categories are explained clearly.
Symptom vs Solution Quick Reference
| Visible Symptom | Likely Cause | Recommended Action |
|---|---|---|
| Light dripping after long usage | Dirty filter | Clean or replace filter |
| Sudden heavy dripping after shutdown | Frozen coil melting | Check airflow, inspect refrigerant |
| Continuous dripping during operation | Blocked drain pipe | Clear drain using suction |
| Water leaking from front panel | Improper leveling | Installation adjustment |
| Leakage with weak cooling | Refrigerant imbalance | Professional inspection |
Preventive Maintenance to Avoid Future Leakage
Prevention is far less stressful than emergency cleanup. To reduce the chance of water leakage from split AC systems:
- Clean air filters every 1–2 months
- Flush drain line periodically
- Inspect external drain pipe for debris
- Schedule seasonal system check before peak summer
Routine maintenance improves cooling efficiency, reduces ice formation risk, and prevents internal microbial buildup.
Why Early Action Saves More Than Money
Ignoring minor leakage can lead to:
- Wall and ceiling damage
- Mold growth behind panels
- Electrical short circuits
- Higher long-term repair costs
Water damage can spread beyond the AC itself, affecting structural elements and indoor air quality. Early diagnosis often keeps the repair within minor or moderate categories rather than major component replacement.
Conclusion
Water leakage from split AC is often caused by drainage interruption, airflow restriction, or maintenance gaps rather than catastrophic failure. Immediate action such as shutting off the unit and protecting surroundings prevents damage. A structured diagnostic approach—from checking filters to inspecting drain pipes—helps identify the root cause logically. Simple DIY steps like suction clearing can resolve minor blockages, but refrigerant imbalance, tray damage, or pump failure require professional support. Acting early protects your home, indoor air quality, and long-term system efficiency.