Ceiling water leakage is one of the most stressful home problems because it feels urgent, unpredictable, and potentially expensive. Whether you see a growing water stain, a sagging ceiling bubble, or active dripping near a light fixture, your first priority is safety and damage control. Acting calmly in the first minutes can significantly reduce structural damage, electrical risk, and long-term repair costs.
Table of Contents
ToggleImmediate Emergency Actions in the First Minutes
When you notice ceiling water leakage, your response during the first 5–15 minutes matters more than anything else. The goal is not permanent repair. The goal is to stop further damage and eliminate safety hazards.
1. Protect People First
- Move people and pets away from the affected area.
- Avoid standing directly under bulging or sagging sections.
- If water is near electrical fixtures, assume there is electrical risk.
2. Shut Off Electricity Near the Leak
If water is dripping near ceiling lights, fans, or wiring, turn off the power to that circuit immediately from your breaker panel. Water and electricity together create a fire and shock risk. If you are unsure which breaker controls the area, it is safer to shut off power to the entire section of the home.
3. Stop the Main Water Supply (If Plumbing Is Suspected)
If you suspect a plumbing issue—such as a burst pipe or upstairs bathroom overflow—turn off the main water supply valve. This prevents continuous water flow that could saturate insulation and structural framing.
4. Safely Drain a Ceiling Bulge
If you see a ceiling bulge filled with trapped water, do not ignore it. The water will eventually break through unpredictably. Place a bucket underneath, use a screwdriver to gently puncture the lowest point of the bulge, and allow water to drain in a controlled way. This reduces sudden collapse and limits structural spread.
5. Contain the Spread
- Place buckets or containers under active drips.
- Lay plastic sheets or waterproof covers over furniture.
- Move electronics away from the affected zone.
These first steps buy you time. Once immediate risk is reduced, you can move to source identification.
Step-by-Step Source Identification Guide
Not all ceiling water leakage comes from the same source. Identifying whether the issue is roof-related, plumbing-related, or AC-related helps determine urgency and the right professional to call.
Step 1: Check Weather Conditions
- If leakage appears during or after heavy rain, suspect roof flashing, damaged tiles, or clogged gutters.
- If leakage happens regardless of weather, plumbing or AC issues are more likely.
Step 2: Observe Water Flow Behavior
- Steady dripping that increases when taps or toilets are used suggests plumbing.
- Slow moisture buildup without rainfall may indicate AC condensation.
- Sudden heavy flow during rainstorms often points to roof failure.
Step 3: Fixture Testing
If there is an upstairs bathroom, flush toilets or run sinks one at a time. If leakage worsens, you likely have a seal failure or pipe issue.
Step 4: Examine Stain Characteristics
- Brownish stains often indicate long-term roof seepage.
- Clear water with no discoloration may be fresh plumbing leakage.
- Recurring damp spots near AC units may indicate clogged drain lines.
Correct identification prevents unnecessary repairs and helps prioritize the right professional.
Categorized Causes with Signs and Urgency Levels
Roof Flashing Failure (High Urgency During Rain)
Water enters through damaged flashing around chimneys or roof edges. Signs include leakage during storms and widening stains after rainfall.
Clogged Gutters (Moderate to High Urgency)
Overflowing gutters redirect water toward ceilings and walls. Often seasonal and linked to debris buildup.
Toilet Seal Failure (Moderate Urgency)
Water appears below bathroom areas, especially after flushing. Ignoring this can rot subflooring.
Burst or Leaking Pipes (High Urgency)
Continuous leakage even in dry weather. Immediate water shut-off required.
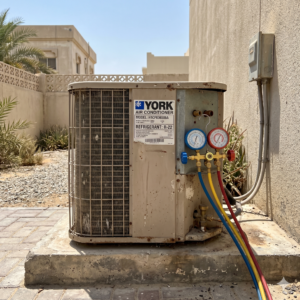
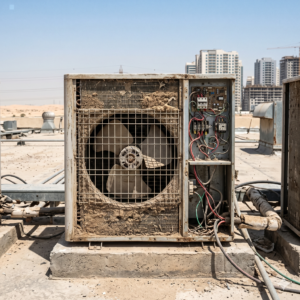
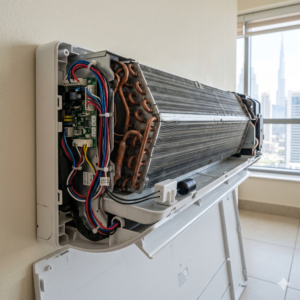
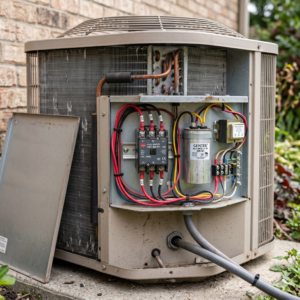
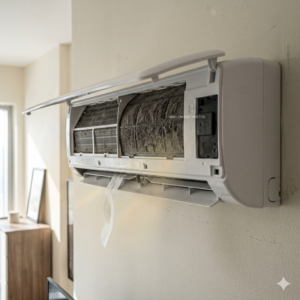
AC Drain Line Blockage (Moderate Urgency)
Condensation water backs up and leaks through ceilings. Often accompanied by reduced cooling performance.
Upstairs Bathroom Overflow (High Urgency)
Sudden large volume water leak caused by blocked drains or unattended tubs.
Hidden Dangers You Should Not Ignore
Ceiling water leakage can create invisible damage beyond the surface stain.
Trapped Water Behind Paint Bubbles
Water collects above drywall and weakens its integrity, increasing collapse risk.
Mold Growth Timeline
Mold can begin developing within 24–48 hours in damp materials. It affects indoor air quality and health.
Insulation Saturation
Wet insulation loses thermal efficiency and may require removal to prevent odor and mold.
Ceiling Joist Weakening
Structural wood can warp or weaken if exposed to prolonged moisture.
Electrical Fire Risks
Moisture around light fixtures increases fire hazard potential.
Progressive Structural Failure
Long-term leaks may spread into walls, causing widespread deterioration.
Repair Versus Replacement Pathways
Once the source is confirmed, repair decisions depend on damage severity.
Minor Patching
Small drywall areas can be dried and patched if structural integrity remains intact.
Pipe or Seal Replacement
Plumbing-related issues may require replacing seals or sections of pipe.
Roof Repairs
Damaged flashing or tiles may need repair or resealing.
Ceiling Section Removal
If water saturation is significant, removing affected drywall allows proper drying.
Drying Equipment Use
Industrial fans and dehumidifiers prevent mold development.
When to Call Professionals
- Call a plumber for pipe or seal failures.
- Call a roofer for rain-related roof leakage.
- Call an HVAC technician for AC condensation issues.
- Consult insurance if structural damage is extensive.
Costs vary significantly depending on the source and extent of damage. It is always recommended to request inspection and ask the professional to explain and tell the price after assessment rather than relying on estimates without evaluation.
Documentation and Insurance Claim Preparation
Before cleaning extensively:
- Take clear photos of stains, bulges, and active leaks.
- Document damaged furniture or electronics.
- Keep repair invoices and inspection reports.
Proper documentation strengthens insurance claims and reduces disputes.
Staying Calm and Prioritizing Damage Control
Ceiling water leakage feels overwhelming, but structured action reduces risk. Focus on safety, stop active water flow, contain damage, then investigate. Compare visual stains with active leaks to understand whether the issue is ongoing or historical. Address the cause before restoring cosmetic finishes.
Remember that structural drying and inspection are more important than immediate repainting. Rushing restoration without fixing the source almost guarantees recurrence.
Conclusion
Ceiling water leakage demands calm and methodical action. By responding quickly, identifying the source correctly, understanding hidden risks, and choosing appropriate repair pathways, you protect your home’s structure, indoor air quality, and safety. Prioritize containment first, investigation second, and restoration only after the true cause is resolved.