Cooling fan installation is a topic that often gets misunderstood because the term “cooling fan” is used for very different situations. Some people mean installing internal fans inside a PC or workstation, while others refer to home cooling fans, DIY ventilation fans, or exhaust fans for rooms and cabinets. Problems usually happen when these use cases are mixed together. This guide explains cooling fan installation step by step, starting from clarifying the use case, checking compatibility before installation, understanding airflow principles, installing fans correctly, configuring them after installation, and finally troubleshooting common issues so you actually see real cooling improvement.
Table of Contents
Toggle#1 Understand the Use Case Before Any Cooling Fan Installation
Before touching tools or buying a fan, the most important step in cooling fan installation is understanding where and why the fan will be used. Many mistakes happen because people apply PC cooling logic to home fans, or home ventilation logic to PC internal fans.
PC internal fans are designed to move air through a closed case to remove heat from components like the CPU, GPU, motherboard, and storage. These fans work together with heatsinks and rely heavily on airflow direction, pressure balance, and system control.
Home or DIY cooling fans are usually used for room ventilation, cabinet cooling, or air circulation. Examples include wall-mounted exhaust fans, inline duct fans, desk fans, or DIY box-fan setups. These fans focus more on moving air in or out of a space rather than targeting specific heat sources.
Understanding this difference matters because:
- PC fans are controlled electronically and depend on motherboard headers.
- Home fans often use direct AC power or simple DC adapters.
- Airflow mistakes inside a PC can trap heat, while in rooms they can cause poor circulation.
Once you clearly define whether the cooling fan installation is for a PC or for a home/DIY setup, the rest of the decisions become much easier.
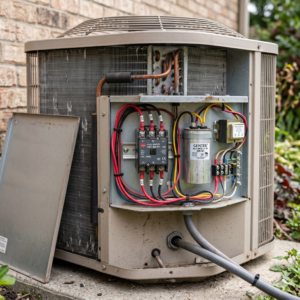
#2 Pre-Installation Compatibility Check for Cooling Fans
Skipping compatibility checks is one of the fastest ways to waste time and money. Before installing any cooling fan, you should verify that it physically fits, electrically connects, and behaves as expected.
Fan Size and Physical Fitment
Fan size is critical, especially for PC installations. Common PC fan sizes include 80mm, 92mm, 120mm, and 140mm. The fan must match the mounting points of the case or radiator.
For home or DIY setups, size matters in a different way. You need to check:
- Opening or cutout size where the fan will be mounted
- Wall or panel thickness
- Available space around the fan for airflow
A fan that physically fits but has blocked airflow will not cool effectively.
Header Types and Power Connections
In PC cooling fan installation, fan headers are a common source of confusion:
- 3-pin fans: Voltage-controlled, speed adjusted by reducing voltage.
- 4-pin fans: PWM-controlled, speed adjusted via signal while voltage remains constant.
A 3-pin fan can usually connect to a 4-pin header, but speed control behavior may differ. A 4-pin fan on a 3-pin header will often run at full speed.
For home or DIY fans, power connections are usually simpler, but you still need to confirm:
- AC voltage compatibility
- DC adapter rating
- Current draw limits
Power Control Behavior
Some users expect fans to automatically adjust speed, but not all setups support this. In PCs, automatic control depends on BIOS settings, sensor mapping, and header capability. In DIY setups, many fans run at fixed speed unless a controller or dimmer is added.
Physical Clearance Constraints
Clearance issues are often overlooked. In PC cases, fans may interfere with:
- RAM heatsinks
- CPU cooler height
- Cable bundles
In home installations, clearance issues may involve walls, furniture, or duct bends that restrict airflow.
#3 Core Airflow Principles You Must Understand
Cooling fan installation without airflow knowledge often leads to disappointment. Fans move air, but airflow direction and balance determine whether heat is actually removed.
Intake vs Exhaust Placement
Intake fans pull cool air into a space or case. Exhaust fans push warm air out. Both are needed to create effective airflow.
In PC setups:
- Front and bottom fans are usually intake.
- Rear and top fans are usually exhaust.
In home or DIY setups:
- Exhaust fans remove hot or stale air.
- Intake openings allow fresh air to replace it.
Identifying Airflow Direction on a Fan
Most fans have small arrows on the frame showing airflow direction and blade rotation. Ignoring these indicators is a common mistake.
If arrows are not visible:
- Air usually flows from the open side toward the side with support struts.
- The side with the motor hub supports is typically the exhaust side.
Pressure Balance Concepts
Pressure balance matters, especially in PCs:
- Positive pressure: More intake than exhaust, helps reduce dust.
- Negative pressure: More exhaust than intake, can pull dust through gaps.
- Balanced pressure: Intake and exhaust roughly equal.
In home setups, pressure imbalance can cause drafts, noise, or ineffective ventilation.
#4 Proper Cooling Fan Installation Practices
Correct installation goes beyond just screwing the fan into place.
Fan Orientation
Always confirm airflow direction before mounting. Installing a fan backward is one of the most common causes of poor cooling.
Cable Routing
Poor cable routing can block airflow or cause noise. Best practices include:
- Keep cables away from fan blades.
- Route cables along edges or behind panels.
- Use cable ties or clips for stability.
Vibration Control Methods
Fans can transmit vibration into cases or walls. To reduce noise:
- Use rubber grommets or vibration-damping mounts.
- Avoid overtightening screws.
- Ensure the mounting surface is flat.
Multi-Fan Connection Options
When installing multiple fans:
- Splitters: Allow two fans on one header, but share control.
- Fan hubs: Provide better power distribution and cleaner wiring.
Always check current limits to avoid overloading headers or power supplies.
#5 Post-Installation Configuration and Control
Cooling fan installation is not complete until configuration is checked.
BIOS or System-Level Fan Control
For PCs, enter BIOS or UEFI to:
- Confirm fans are detected.
- Select correct control mode (PWM or DC).
- Assign temperature sensors.
Speed Curves and Noise Balance
Speed curves allow fans to run quietly at low temperatures and ramp up only when needed. This improves comfort without sacrificing cooling.
Basic Monitoring After Installation
After installation, monitor:
- Idle and load temperatures
- Fan speeds
- Noise levels
If temperatures do not improve, airflow direction or placement may need adjustment.
#6 Troubleshooting Common Cooling Fan Installation Problems
Fan Not Spinning
Common causes include incorrect header connection, incompatible control mode, or insufficient power.
Abnormal Noise
Noise may come from vibration, cable contact, or bearing issues.
No Temperature Improvement
This often means airflow is incorrect or heat is not being exhausted properly.
Incorrect Airflow Setup
Double-check directional arrows on the fan frame. This simple step fixes many issues.
#7 Comparing Airflow Strategies
| Strategy | Pros | Cons |
|---|---|---|
| High Intake Focus | Lower dust, stable airflow | Heat buildup if exhaust is weak |
| High Exhaust Focus | Strong heat removal | More dust ingress |
| Balanced Airflow | Consistent cooling | Requires careful tuning |
Conclusion
Cooling fan installation works best when it starts with clarity about the use case and continues with careful compatibility checks, correct airflow planning, proper mounting, and thoughtful configuration. Whether you are installing internal PC fans or setting up home or DIY cooling, understanding airflow direction, pressure balance, and control behavior makes the difference between effective cooling and wasted effort.
By following these steps, you avoid common mistakes like backward airflow, incompatible connections, and noisy setups. More importantly, you gain predictable cooling performance and a system that runs cooler, quieter, and more reliably over time.