Setting up a portable ac setup may look simple out of the box, but many early failures, weak cooling, bad odors, and electrical issues happen because of small setup mistakes made in the first few hours. This guide explains how to set up a portable AC correctly from day one, so you avoid early damage, get better cooling performance, and reduce long-term problems.
Table of Contents
ToggleOut-of-the-Box Essentials That Prevent Early Damage
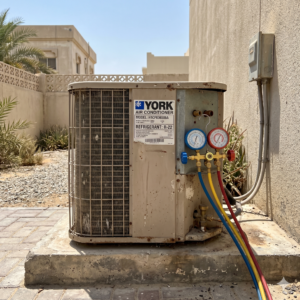
One of the most common mistakes with a portable AC happens before it is even turned on. Many users rush the setup, especially during hot weather, without realizing that portable AC units contain refrigerant and compressor oil that need time to settle properly.
Let the Unit Stand Upright Before Use
If your portable AC was transported on its side or tilted during delivery, it must stand upright before powering on. This allows the refrigerant and compressor oil to return to their correct positions.
- Keep the unit upright for at least 4–6 hours before first use.
- If it was heavily tilted, waiting up to 24 hours is safer.
- Skipping this step can damage the compressor and shorten the unit’s lifespan.
This single step prevents one of the most common causes of early portable AC failure.
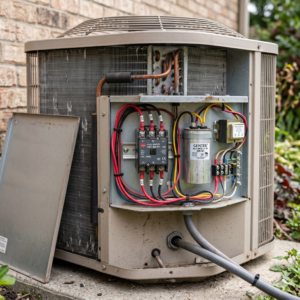
Safe Power Use and Circuit Protection
Portable AC units draw more power than most household appliances. Plugging them into overloaded circuits or extension cords can cause frequent shutdowns, tripped breakers, or long-term electrical damage.
- Always plug directly into a wall outlet.
- Avoid extension cords or power strips.
- Use a dedicated outlet when possible.
- Check the unit’s rated amperage and make sure the circuit can handle it.
Electrical overload does not always fail immediately. Sometimes it causes unstable performance that slowly damages internal components.
Window Venting Options and Proper Exhaust Setup
Portable AC units remove heat by exhausting warm air outside. If this step is done poorly, cooling efficiency drops sharply no matter how powerful the unit is.
Using the Standard Window Kit
Most portable AC units come with a basic window vent kit designed for sliding windows.
- Install the kit tightly with no visible gaps.
- Make sure the exhaust hose clicks firmly into place.
- Do not bend or crush the hose.
Even small gaps around the window kit allow hot air to re-enter the room, forcing the AC to work harder.
Solutions for Non-Standard Windows and Doors
Not all homes have compatible windows. Casement windows, tilt windows, or sliding doors require alternative solutions.
- Use acrylic, plywood, or insulated foam boards cut to size.
- Seal edges with weather stripping or foam tape.
- Ensure the exhaust port is tightly fitted and sealed.
The goal is not appearance, but airtight separation between indoor and outdoor air.
Wall Venting Alternatives
Some users choose wall venting for a more permanent solution.
- Wall venting reduces daily setup hassle.
- It can improve airflow consistency.
- Proper sealing around the wall opening is critical.
If wall venting is considered, ensure no air leakage remains, as this can create hidden efficiency loss.
Achieving an Airtight Seal
An airtight seal is one of the biggest factors in portable AC performance.
- Use foam tape around window kits.
- Seal unused window gaps completely.
- Check for warm air leaks by hand after installation.
Even a powerful portable AC cannot overcome constant hot air leakage.
Cooling Efficiency Optimization
Once venting is done, cooling efficiency depends on how air flows through and out of the unit.
Exhaust Hose Length and Routing
The exhaust hose should be as short and straight as possible.
- Long hoses trap heat and reduce efficiency.
- Sharp bends restrict airflow.
- Keep the hose under the manufacturer’s maximum length.
A shorter hose means faster heat removal.
Insulating the Exhaust Hose
The exhaust hose becomes hot during operation and radiates heat back into the room.
- Hose insulation reduces heat re-entry.
- It improves cooling efficiency in small rooms.
- It reduces the unit’s runtime.
This is especially helpful in hot climates or poorly insulated rooms.
Airflow Balance and Room Layout
Portable AC units need clear airflow.
- Do not block air intakes.
- Keep furniture away from the exhaust and intake sides.
- Allow space around the unit as recommended.
Restricted airflow causes overheating and weak cooling.
Understanding Negative Pressure Effects
Single-hose portable AC units create negative pressure by exhausting indoor air.
- Hot air may be pulled in from other rooms.
- Doors and gaps worsen this effect.
- Sealing unused openings improves performance.
This explains why some rooms never feel cool despite constant AC operation.
Drainage Strategies and Moisture Management
Portable AC units remove moisture from the air. If drainage is ignored, the unit may shut down or develop odor issues.
Manual Water Tank Emptying
Most portable ACs have internal water tanks.
- Check tank levels regularly.
- Empty when the indicator appears.
- Do not wait for automatic shutoff.
Frequent shutdowns due to full tanks reduce comfort and stress the system.
Gravity Drain Setup
Some units allow continuous gravity drainage.
- Use a hose connected to the drain port.
- Ensure downward slope for proper flow.
- Position near a floor drain if possible.
This setup reduces maintenance but must be leak-free.
Pump-Assisted Drainage
In locations without floor drains, pump-assisted drainage may be used.
- Pumps move water upward when needed.
- Installation must follow manufacturer guidelines.
- When cost is relevant, pricing should be discussed clearly before installation.
Poor drainage setup often leads to odor and internal mold growth.
Ongoing Maintenance to Prevent Odor and Mold
Even a perfectly installed portable AC needs basic maintenance.
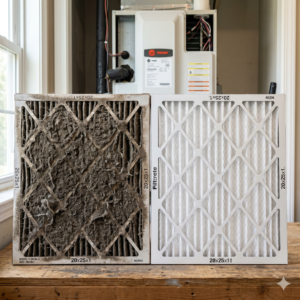
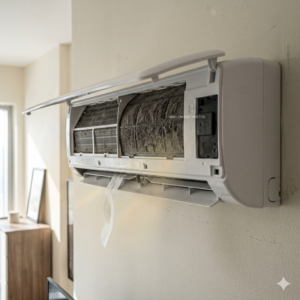
Filter Cleaning Intervals
Dirty filters restrict airflow and reduce cooling.
- Clean filters every 1–2 weeks in heavy use.
- Wash with mild soap and water.
- Let filters dry completely before reinstalling.
Moisture Removal After Use
Moisture left inside the unit encourages mold.
- Run fan-only mode before shutting down.
- Empty water tanks regularly.
- Keep vents open briefly after use.
End-of-Season Storage
Improper storage causes bad smells next season.
- Drain all water before storage.
- Clean filters and internal surfaces.
- Store in a dry, ventilated area.
Quick Troubleshooting for Common Setup Failures
Many portable AC complaints come from setup-related issues rather than defective units.
Loose Exhaust Hose
If cooling is weak, check hose connections.
- Ensure hose is locked in place.
- Check for air leaks.
Poor Sealing Around Windows
Hot air leakage defeats cooling.
- Seal gaps completely.
- Recheck after the first day of use.
Automatic Shutoffs
Frequent shutdowns often indicate:
- Full water tank
- Overheating due to airflow blockage
- Electrical overload
Weak Cooling Performance
If cooling feels insufficient:
- Shorten exhaust hose
- Improve sealing
- Reduce room size or heat sources
When Setup Issues Should Be Addressed Properly
Portable AC problems rarely fix themselves. Poor setup can lead to higher energy use, unpleasant odors, frequent shutdowns, and early component failure. Addressing setup issues early protects the unit and improves daily comfort. If setup problems persist or performance remains unstable, professional guidance can help identify airflow, drainage, or electrical issues before they cause permanent damage.
Conclusion
A proper portable ac setup is not about convenience alone. It directly affects cooling performance, energy efficiency, air quality, and the lifespan of the unit. Small steps such as allowing upright settling time, sealing exhaust paths, managing moisture, and maintaining airflow can make a large difference.
By focusing on correct installation, efficient venting, moisture control, and routine maintenance, you avoid common frustrations like weak cooling, bad smells, and repeated shutdowns. When portable AC setup is done correctly from the start, the unit performs more reliably, lasts longer, and delivers the comfort it was designed to provide.