Installing an AC unit on a wall may look simple from the outside, but ac installation on wall is one of those tasks where small mistakes can lead to long-term discomfort, higher electricity use, water leakage, or even permanent wall damage. Many people only think about where the unit looks best, without realizing that airflow clearance, wall strength, drainage slope, electrical load, and installation sequence all play critical roles. This guide explains, in a practical and clear way, how wall-mounted AC installation should be done properly, what hidden details are often overlooked, and why correct installation matters as much as the AC unit itself.
Table of Contents
ToggleUnderstanding Why Wall Installation Matters More Than You Think
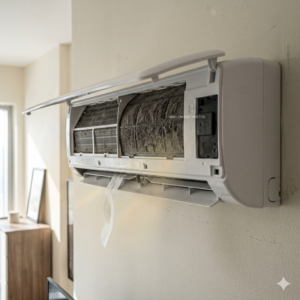
A wall-mounted AC unit interacts directly with your room, your wall structure, and the rest of the cooling system. Unlike floor-standing or ceiling-mounted systems, wall installation places the unit at eye level or above, making airflow direction, vibration control, and visual balance especially important.
When ac installation on wall is done incorrectly, problems usually do not appear immediately. Cooling may seem fine on day one, but weeks or months later you may notice uneven temperature, dripping water, rattling noise, or visible wall stains. These issues are often blamed on the AC brand or “bad luck,” when in reality they originate from poor installation decisions.
Correct Placement Rules for Wall-Mounted AC Units
Placement is the foundation of a successful installation. Choosing the wrong spot can affect airflow efficiency, comfort, and even system lifespan.
Minimum Clearance for Proper Airflow
Wall-mounted AC units require clear space around them to breathe. Blocking airflow forces the system to work harder, reducing efficiency and increasing wear.
- Top clearance is needed so warm return air can enter freely.
- Side clearance prevents turbulence and uneven airflow.
- Front clearance ensures cool air spreads evenly across the room.
Placing the unit too close to ceilings, corners, or built-in cabinets restricts airflow and often results in hot spots or weak cooling.
Proper Mounting Height for Comfort and Efficiency
Mounting height affects how cool air travels through the room. Installing the unit too low can cause cold drafts directly on occupants, while installing it too high may reduce circulation efficiency.
Proper height allows cool air to descend naturally and mix with room air, creating even temperature distribution without discomfort.
Securing the Unit to Structural Support
One of the most critical mistakes in ac installation on wall is fixing the unit to bare drywall without proper anchoring. Drywall alone cannot support long-term weight and vibration.
The mounting bracket must be secured to:
- Concrete or solid masonry walls, or
- Structural studs or reinforced backing.
Failure to do this can lead to loosening over time, vibration noise, cracks, or even unit detachment.
Hidden Installation Logistics Most People Never See
What happens behind the wall often matters more than what you see on the surface. Many installation failures are hidden until damage becomes visible.
Condensate Drainage Slope Requirements
Every wall-mounted AC produces condensate water. This water must flow out smoothly through the drain line.
Key rules include:
- The drain line must have a continuous downward slope.
- No upward loops that trap water.
- No sharp bends that encourage blockage.
If gravity drainage is not possible due to layout, a condensate pump must be used. Skipping this step often leads to water backing up into the unit and dripping onto walls or floors.
Using Pumps When Gravity Drainage Is Not Possible
In apartments or rooms far from drainage points, gravity flow may not work. In such cases, a condensate pump safely lifts water to the nearest drain.
Ignoring this requirement can cause hidden water leaks inside walls, leading to mold growth and structural damage.
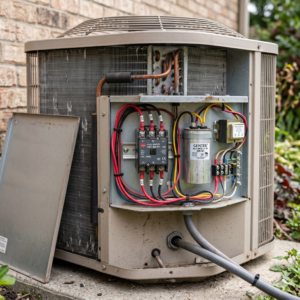
Dedicated Electrical Supply to Prevent Overload
Wall-mounted AC units should be connected to a dedicated electrical circuit. Plugging into shared outlets or overloaded lines can cause:
- Frequent tripping of breakers
- Voltage instability
- Damage to AC electronics
Proper electrical planning ensures stable operation and protects both the AC and your home’s wiring.
Clear Installation Flow That Professionals Follow
A structured installation process reduces errors and ensures long-term reliability.
Wall Bracket Leveling
The mounting bracket must be perfectly level. Even slight tilting can affect drainage and airflow.
Professionals use precision leveling tools rather than visual estimation.
Correct Wall Penetration Angle
The hole through the wall for piping and drainage should be angled slightly downward toward the outside. This supports gravity drainage and prevents water from flowing back indoors.
Refrigerant Line Handling
Refrigerant pipes must be:
- Properly insulated to prevent condensation.
- Gently bent to avoid kinks.
- Protected from sharp edges inside walls.
Poor handling here often leads to reduced efficiency or refrigerant leakage over time.
Moisture Removal Through Proper Vacuuming
Before releasing refrigerant into the system, proper vacuuming removes air and moisture from the pipes.
Skipping or rushing this step can cause:
- Reduced cooling performance
- Internal corrosion
- Long-term compressor damage
Final System Checks
After installation, professionals perform final checks including:
- Cooling performance test
- Drainage verification
- Electrical safety check
- Noise and vibration inspection
This ensures the system works as intended before leaving the site.
Aesthetic and Interior Design Considerations
Wall-mounted AC units are visible elements in a room. Installation should respect both function and appearance.
Concealing Piping Without Blocking Airflow
Pipes and cables can be concealed using covers or trunking that blend with wall color. However, these covers must not block airflow or restrict maintenance access.
Safe Integration with Wall Features
Installing near shelves, curtains, or decorative panels requires careful spacing. Blocking airflow reduces efficiency and can cause uneven cooling.
Visual Harmony with Interior Finishes
Proper placement considers symmetry, sightlines, and room layout. A well-placed unit feels intentional rather than intrusive.
DIY Installation Risks Versus Professional Installation Benefits
DIY installation may seem attractive, especially for those trying to save time or money. However, ac installation on wall involves specialized tools, precise measurements, and technical knowledge.
DIY Risks
- Incorrect wall anchoring leading to vibration or detachment
- Improper drainage causing hidden water damage
- Air and moisture left in refrigerant lines
- Electrical overload or safety hazards
Many DIY installations work “well enough” at first, only to fail later when damage is harder and more expensive to fix.
Professional Installation Benefits
- Correct tools and procedures
- Clean workmanship and finishing
- Reduced risk of future leaks or failures
- Warranty protection for both unit and installation
Professional installation focuses on preventing errors rather than fixing them later.
Pre-Installation Checklist to Avoid Irreversible Wall Damage
Before starting ac installation on wall, a proper checklist protects both the system and your property.
- Confirm wall strength and structural support.
- Check for hidden electrical wiring or plumbing.
- Verify outdoor unit placement readiness.
- Ensure sufficient space for airflow and maintenance.
- Confirm drainage route and slope feasibility.
Skipping these checks often leads to unnecessary drilling, patching, or permanent wall scars.
When Professional Help Makes the Most Sense
Wall-mounted AC installation affects comfort, efficiency, indoor air quality, and long-term system reliability. Mistakes at installation stage are difficult to reverse once walls are drilled and units are mounted.
Bio On Air handles AC installation with a focus on correct placement, safe mounting, proper drainage, and clean finishing. Our approach prioritizes prevention, clarity, and long-term performance rather than rushed setup.
If you want to understand how professional installation works or what preparation is needed, you can review our AC installation and replacement service for detailed guidance.
Conclusion
Proper ac installation on wall is about much more than hanging a unit and turning it on. It involves airflow planning, structural safety, hidden logistics like drainage and vacuuming, and thoughtful integration with your interior. When installation is done correctly, your AC cools evenly, runs efficiently, and stays reliable for years.
Rushing installation or overlooking technical details often leads to repeated discomfort, hidden damage, and higher long-term costs. By understanding the correct process and choosing experienced professionals, you protect your walls, your comfort, and your investment from the very first day.