Split AC installation is not just about mounting two units and turning the system on. When done incorrectly, even a brand-new split AC can suffer from poor cooling, water leakage, abnormal noise, high electricity consumption, or long-term damage that shortens its lifespan. Many people underestimate how much planning, precision, and system understanding is required before, during, and after installation. This guide explains split ac installation in a clear, end-to-end flow—from preparation and placement strategy to installation steps, critical technical details, troubleshooting, and the practical decision between DIY and professional installation—so you can avoid costly mistakes and post-installation anxiety.
Table of Contents
TogglePre-Installation Checklist for Split AC Installation
A successful split AC installation starts long before drilling the wall. Most performance issues originate from poor planning rather than faulty equipment. A proper pre-installation checklist helps ensure the system works efficiently from day one.
Capacity Matching to Room Size
Choosing the correct AC capacity is one of the most important decisions. An undersized unit will struggle to cool the room, run continuously, and consume more electricity. An oversized unit may cool too quickly, cycle frequently, and fail to control humidity properly.
Capacity should be matched based on:
- Room size and ceiling height
- Sun exposure and insulation quality
- Number of occupants and heat-generating appliances
Incorrect capacity selection often leads to complaints like “the AC is new but cooling feels uneven” or “the AC turns on and off too frequently.”
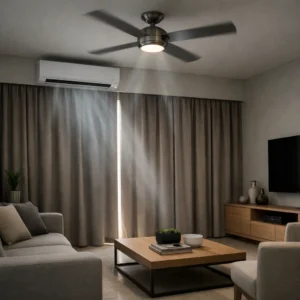
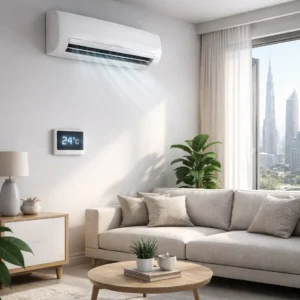
Indoor Unit Placement Strategy
The indoor unit must be positioned to distribute air evenly across the room. Poor placement can create hot spots, drafts, or airflow obstruction.
Key considerations include:
- Mounting height to allow proper air circulation
- Distance from ceiling and side walls
- Avoiding direct airflow toward seating or sleeping areas
Improper placement can also increase noise perception and reduce comfort even when cooling performance is technically adequate.
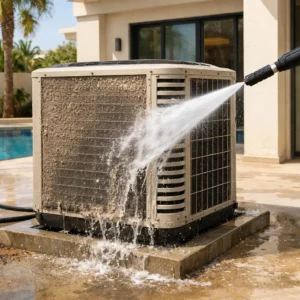
Outdoor Unit Placement Strategy
The outdoor unit releases heat absorbed from inside the room. Its placement directly affects efficiency and system reliability.
Important factors include:
- Sufficient airflow clearance around the condenser
- Protection from direct sunlight where possible
- Stable mounting to prevent vibration and noise
Poor outdoor placement can cause overheating, reduced cooling capacity, and premature compressor wear.
Airflow Clearance and Obstruction Check
Both indoor and outdoor units require unobstructed airflow. Curtains, furniture, shelves, or structural elements can block air movement and reduce performance.
Ensuring clear airflow reduces strain on the system and helps maintain consistent temperature throughout the room.
Drainage Direction and Slope Planning
Drainage planning is often overlooked, yet it is one of the most common causes of post-installation complaints.
The drain line must:
- Have a continuous downward slope
- Be routed away from sensitive areas
- Avoid sharp bends or upward loops
Poor drainage design often leads to water leakage from the indoor unit, especially after prolonged use.
Wall Integrity and Hidden Utilities Check
Before drilling, it is critical to assess wall strength and identify hidden utilities such as electrical wiring or plumbing.
Drilling blindly can cause:
- Structural damage
- Electrical hazards
- Water pipe leaks
This step alone prevents many expensive and dangerous mistakes during split AC installation.
Step-by-Step Split AC Installation Sequence
Once planning is complete, installation should follow a logical and disciplined sequence. Skipping steps or changing order often introduces hidden issues.
Indoor Unit Mounting and Positioning
The indoor mounting plate must be fixed securely and level. Even slight tilting can affect drainage and airflow.
The mounting position should ensure:
- Correct alignment with the piping exit
- Ease of future servicing
- Stable support to prevent vibration
Wall Drilling Angle and Hole Preparation
The wall hole for refrigerant piping, drain hose, and cables should be drilled at a slight downward angle toward the outdoor side.
This ensures:
- Proper condensate drainage
- No water backflow into the indoor unit
- Clean routing of lines
An incorrect drilling angle is a common cause of water leakage after installation.
Refrigerant Line Routing
Refrigerant pipes connect the indoor and outdoor units. Their routing affects both performance and aesthetics.
Best practices include:
- Keeping pipe length within manufacturer limits
- Avoiding unnecessary bends
- Using proper insulation to prevent condensation
Poor routing can cause pressure loss, oil return issues, and long-term compressor stress.
Electrical and Communication Connections
Electrical wiring must follow the manufacturer’s specifications exactly. Incorrect wiring can cause system malfunction or permanent damage.
Key points include:
- Correct cable size and grounding
- Secure terminal connections
- Proper communication cable alignment between units
Electrical shortcuts may not fail immediately, but they increase long-term risk.
Outdoor Unit Installation and Positioning
The outdoor unit must be placed on a stable base or bracket designed to handle vibration and weight.
Positioning should allow:
- Easy airflow through the condenser
- Access for maintenance
- Minimal noise transmission to living spaces
Critical but Often Overlooked Essentials
Many split AC problems are caused not by visible mistakes, but by skipped technical essentials during installation.
Proper Vacuuming of Refrigerant Lines
Vacuuming removes air and moisture from the refrigerant lines before releasing refrigerant.
Skipping this step can cause:
- Poor cooling efficiency
- Internal corrosion
- Compressor damage over time
Vacuuming is not optional—it is a fundamental requirement for system reliability.
Correct Pipe Flaring Technique
Flare connections must be smooth, properly shaped, and tightened to the correct torque.
Poor flaring can lead to:
- Refrigerant leaks
- Repeated gas refills
- Loss of cooling performance
Drainage Configuration and Traps
Drain lines must be configured to prevent backflow and air suction.
In certain installations, proper traps are required to:
- Prevent odor return
- Ensure steady drainage
Oil Traps and Height Considerations
In installations with significant height differences between indoor and outdoor units, oil traps may be required.
Without proper oil return management, compressor lubrication can be compromised, leading to premature failure.
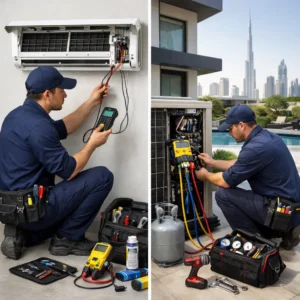
Tools and Materials Overview for Split AC Installation
Split AC installation requires more than basic household tools. Understanding the categories helps clarify why professional installation is often recommended.
Basic Tools
- Drilling machine and bits
- Level and measuring tools
- Wrenches and screwdrivers
Specialized HVAC Instruments
- Vacuum pump
- Manifold gauge set
- Pipe flaring tools
Consumables
- Insulated refrigerant pipes
- Drain hoses
- Mounting brackets and fasteners
Instead of listing exact prices, it is better to understand that these tools represent both cost and skill investment. This is why installation pricing reflects more than just labor time.
DIY vs Professional Split AC Installation
Many people consider DIY installation to save money, but the decision should be weighed carefully.
Cost Considerations
DIY may seem cheaper upfront, but hidden costs often appear later through poor performance, repairs, or voided warranties.
Warranty Impact
Improper installation can void manufacturer warranties, leaving you responsible for future repairs.
Risk Exposure
DIY installation increases exposure to:
- Refrigerant handling risks
- Electrical hazards
- Structural damage
Skill and Responsibility Boundaries
Professional installation assigns responsibility to the installer. With DIY, all risk remains with the homeowner.
This is why many people choose professional AC installation and replacement services to reduce uncertainty and protect long-term performance.
Troubleshooting Common First-Start Issues
Even after installation, first-start issues can occur. Understanding system relationships helps reduce stress.
Water Leakage
Usually caused by improper drain slope, blockage, or incorrect indoor unit leveling.
Poor Cooling Performance
May be related to vacuuming issues, refrigerant leaks, or airflow obstruction.
Abnormal Noise
Often due to loose mounting, vibration, or pipe contact with walls.
Airflow Problems
Usually linked to placement, obstruction, or incorrect fan settings.
When Split AC Installation Should Be Handled Properly
Installation errors do not always show immediate symptoms. Over time, they can lead to reduced air quality, increased energy consumption, repeated breakdowns, and permanent system damage. Bio On Air handles split AC installation with structured planning, correct technical procedures, and clear communication to reduce these risks. Addressing installation properly from the start is a preventive step that protects comfort, health, and long-term cost. You can use the WhatsApp or Call button at the top right of this page to discuss installation planning or clarify technical concerns with our team.
Conclusion
Split AC installation is a system-level process, not a simple mounting task. From capacity matching and placement strategy to vacuuming, flaring, and drainage design, each step affects performance, reliability, and comfort. Understanding the full installation flow helps you ask the right questions, recognize red flags, and reduce post-installation anxiety.
Whether you choose DIY for basic preparation or professional installation for full responsibility, the goal is the same: a system that cools efficiently, runs quietly, and lasts for years without repeated problems. In climates where AC is essential, getting installation right from the beginning is one of the most cost-effective decisions you can make.