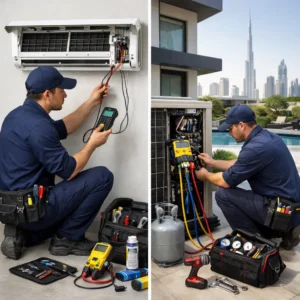
If you are searching for how to remove outdoor ac unit cover, it usually means you want to clean, inspect, or troubleshoot your AC system safely. In the UAE, outdoor condenser units are exposed to dust, sand, and heat, so knowing how to open them correctly can help prevent damage and maintain performance.
Table of Contents
ToggleWhy You May Need to Remove the Outdoor AC Unit Cover
The outdoor unit (condenser) is where heat is released from your AC system. Over time, dust, sand, and debris accumulate inside, especially in coastal or desert environments like Dubai.
You may need to open the unit for:
- Cleaning sand and dust buildup
- Inspecting condenser coils
- Checking fan condition
- Identifying visible damage or blockage
However, opening the unit incorrectly can damage components or create safety risks. That is why following the correct process is essential.
Mandatory Safety Steps Before Opening the Unit
1. Turn Off Power at the Outdoor Isolator
Before touching anything, completely shut off power to the outdoor unit using the isolator switch located near the condenser. This is not optional—it is critical.
Never rely only on turning off the AC from the remote or thermostat. The unit may still carry electrical current.
2. Wait for Capacitor Discharge
Even after power is off, capacitors inside the unit can hold electrical charge.
- Wait at least 5–10 minutes before opening
- Avoid touching electrical components directly
This step reduces the risk of electric shock.
3. Work in a Dry and Stable Environment
Avoid opening the unit if:
- The ground is wet
- There is water around the unit
- Weather conditions are unstable
Dry conditions improve safety and visibility.
Tools You Will Need
Most residential split AC condenser units use standard hardware, so you do not need specialized tools.
- Screwdriver set (Phillips and flathead)
- Nut driver or socket wrench (common sizes)
- Gloves for hand protection
- Small container for screws
- Soft brush or cloth for cleaning
Using the correct tool size prevents stripping screws or damaging panels.
Understanding the Outdoor Unit Structure
Before removing anything, it helps to understand how the unit is built.
- Top cover: holds the fan and motor
- Side panels: protect coils and internal components
- Base frame: supports the entire system
Most units are designed so that the top fan grille must be removed first before accessing internal parts.
Step-by-Step How to Remove Outdoor AC Unit Cover
Step 1: Remove the Top Fan Grille
The top panel usually contains the fan. It is secured with screws around the edges.
- Locate all screws on the top panel
- Remove them evenly (do not skip corners)
- Lift the grille slowly
Important: The fan is connected by wiring. Do not pull it up aggressively.
Step 2: Carefully Handle the Fan Assembly
Once lifted, the fan assembly is still attached to wires.
- Gently place the top cover upside down nearby
- Avoid stretching or twisting the wires
- Do not disconnect wiring unless necessary
This step is where many people accidentally damage the unit.
Step 3: Remove Side Panels
After the top is removed, side panels can be accessed.
- Locate screws along edges or corners
- Unscrew systematically
- Slide or lift panels carefully
Some models use clips or latches instead of screws.
Step 4: Handle Different Screw and Latch Types
Different brands use different fastening systems:
- Standard screws (most common)
- Hex bolts (require socket wrench)
- Snap-fit panels (clip-based)
Do not force panels if they do not move easily—check for hidden screws.
Proper Screw Management
One of the most overlooked steps is managing screws properly.
- Use a small container or tray
- Keep screws grouped by panel
- Avoid placing them on the ground
Losing screws can make reassembly difficult or unsafe.
What to Inspect After Opening the Unit
1. Sand and Dust Buildup
In UAE environments, sand accumulation is very common. It can block airflow and reduce efficiency.
2. Condenser Coils
Check for dirt buildup on coils. Dirty coils reduce heat transfer and cooling performance.
3. Fan Condition
Inspect blades for:
- Dust accumulation
- Damage or imbalance
4. Visible Blockages
Look for debris such as leaves, plastic, or insects inside the unit.
Safe Cleaning Methods for Outdoor Units
Cleaning must be done carefully to avoid damage.
- Use a soft brush to remove loose dust
- Wipe surfaces gently with a dry cloth
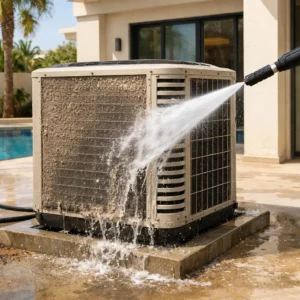
- Avoid high-pressure water directly on components
For coastal or dusty environments, cleaning should be gentle but thorough.
What to Avoid During Cleaning
- Do not bend condenser fins
- Do not spray water into electrical areas
- Do not use harsh chemicals
Improper cleaning can cause more damage than dirt itself.
How to Reassemble the Outdoor Unit
Step 1: Reattach Side Panels
- Align panels correctly
- Insert screws loosely first
- Tighten evenly
Step 2: Reinstall Top Fan Cover
- Place fan assembly carefully
- Ensure wires are not pinched
- Tighten screws securely
Step 3: Final Check
- All screws secured
- No loose parts
- Panels aligned properly
Testing the Unit After Reassembly
- Turn power back on at isolator
- Start AC system
- Check for normal airflow and sound
If you notice unusual noise or vibration, turn off the system immediately and recheck assembly.
Common Mistakes to Avoid
- Forcing rusted screws (can break mounting points)
- Pulling fan wires during removal
- Skipping power shut-off step
- Losing screws or mixing them incorrectly
- Using excessive water during cleaning
These mistakes can turn a simple task into a costly repair.
When You Should Not Open the Unit Yourself
DIY is not always the best option. Avoid opening the unit if:
- You suspect electrical faults
- The unit is making loud or abnormal noise
- There is refrigerant leakage
In these cases, professional AC repair support is recommended to prevent further damage.
Why Regular Cleaning Matters in UAE
Outdoor units in the UAE face continuous exposure to dust, sand, and heat. Without cleaning:
- Airflow becomes restricted
- Cooling efficiency drops
- Energy consumption increases
Regular maintenance helps maintain performance and reduce long-term costs.
DIY vs Professional Cleaning
| Aspect | DIY Cleaning | Professional Service |
|---|---|---|
| Cost | Low | Moderate |
| Depth | Surface level | Deep system cleaning |
| Risk | Higher if done incorrectly | Lower |
DIY works for light cleaning, but deeper issues require proper tools and experience.
Long-Term Maintenance Tips
- Clean outdoor unit every few months
- Keep surrounding area clear
- Schedule periodic professional inspection
Preventive care reduces breakdown risk significantly.
If you are opening your outdoor AC unit to address dust, airflow issues, or early signs of performance drop, it is important to handle it carefully. Improper handling can damage components, affect air quality, and lead to higher repair costs over time. With the right approach, these issues can be managed early and safely. If you are unsure about your unit condition or need deeper cleaning beyond surface-level maintenance, you can use the WhatsApp or Call button on the top right to connect with the Bio On Air team and understand the most suitable next step.
Conclusion
Knowing how to remove outdoor ac unit cover correctly helps you maintain your AC safely and effectively. By following proper safety steps, handling components carefully, and avoiding common mistakes, you can prevent damage and keep your system running efficiently.