When people search for duct cleaning how to, many assume it is a simple weekend task that can fully replace professional cleaning. The reality is more nuanced. Some parts of air ducts can be safely cleaned by homeowners to reduce surface dust and improve airflow, while other sections require professional truck-mounted equipment to remove deeply embedded debris, contaminants, and microbial growth. This guide starts with an honest reality check, then walks you through what DIY duct cleaning can and cannot achieve, how to do it safely, when to stop, and how to decide whether professional help is the smarter long-term option.
Table of Contents
ToggleReality Check: What DIY Duct Cleaning Can and Cannot Do
Before learning duct cleaning how to, it is critical to understand expectations. DIY duct cleaning is best for light surface dust near vents and return air intakes. It can help reduce visible debris, improve short-term airflow, and support routine hygiene. However, it cannot match professional systems designed to clean entire duct networks.
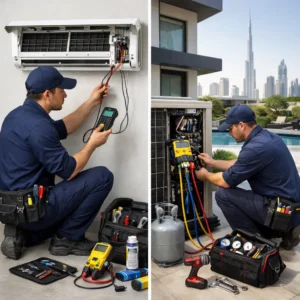
Professional duct cleaning typically uses truck-mounted or high-powered negative-pressure systems. These machines create strong suction across the entire duct network while agitation tools dislodge debris deep inside. DIY equipment simply cannot generate the same airflow or containment.
What DIY duct cleaning can realistically achieve:
- Remove loose dust near supply vents and return grilles
- Clean visible sections of rigid metal ducts close to openings
- Improve airflow slightly if vents were partially blocked
- Support routine maintenance between professional cleanings
What DIY duct cleaning cannot safely achieve:
- Deep cleaning of long duct runs
- Removal of heavy debris, construction dust, or insulation fibers
- Safe cleaning of flexible ducts or fiberglass-lined ducts
- Effective mold remediation or sanitization
Understanding these limits protects both your system and your health. Trying to force DIY methods beyond their capability often leads to duct damage, worsened air quality, or contamination spread.
Which Duct Sections Are Safe to Clean Yourself
Not all ducts are equal. Knowing where you can safely work is essential when learning duct cleaning how to.
Generally safe for DIY cleaning:
- Supply air vents and grilles
- Return air grilles and nearby duct openings
- Short, straight sections of rigid metal duct close to vents
Not recommended for DIY cleaning:
- Flexible ducts (easy to tear or collapse)
- Fiberglass-lined ducts (release fibers if brushed)
- Deep internal duct sections beyond visual reach
- Ducts with visible mold growth or moisture damage
If your home uses flexible or fiberglass-lined ducts, DIY brushing can cause more harm than good. In these cases, surface cleaning of vents combined with professional evaluation is the safer approach.
Essential DIY Duct Cleaning Tools and Their Roles
Effective DIY duct cleaning requires the right tools used correctly. Prices are not discussed here; cost should only be considered when deciding between DIY and professional service.
Basic tools and their purpose:
- Screwdriver: remove vent covers safely
- Soft-bristle brush: loosen dust without scratching metal
- Microfiber cloths: capture fine dust particles
- Household vacuum with hose attachment: extract loosened debris
- HEPA vacuum (if available): reduce dust recirculation
- Protective mask and gloves: protect lungs and skin
- Plastic sheeting or vent covers: seal unused vents during cleaning
Using aggressive tools such as stiff wire brushes, air compressors, or non-HEPA vacuums often pushes dust deeper into the system or releases it into living spaces.
Step-by-Step DIY Duct Cleaning Flow
The steps below outline a logical and safe approach to DIY duct cleaning. Rushing or skipping steps often leads to poor results.
Step 1: Turn Off the HVAC System Completely
Always shut down the AC or heating system before starting. Running the system during cleaning spreads loosened dust throughout the house and increases inhalation risk.
Step 2: Seal All Supply Vents Except the One Being Cleaned
Use plastic sheets or temporary covers to seal vents you are not actively cleaning. This helps concentrate suction and prevents dust from traveling through the duct network.
Step 3: Remove and Clean Vent Covers
Vent covers often collect significant dust. Wash them with mild detergent and let them dry completely before reinstalling.
Step 4: Loosen Dust Inside the Duct Opening
Use a soft-bristle brush to gently loosen dust inside the visible duct area. Avoid pushing debris deeper into the duct.
Step 5: Vacuum Extraction
Immediately vacuum loosened dust using a hose attachment. Move slowly to maximize capture. A HEPA vacuum significantly reduces airborne dust during this step.
Step 6: Pay Extra Attention to Return Air Intakes
Return air ducts collect more debris than supply ducts. Spend additional time cleaning return openings, as this directly affects system airflow and filter load.
Step 7: Replace or Clean the Air Filter
After cleaning, always replace or thoroughly clean the HVAC filter. Leaving an old filter in place allows remaining dust to recirculate.
Critical Warnings and Common Mistakes to Avoid
Many DIY duct cleaning attempts fail due to avoidable mistakes.
Do not brush flexible ducts: they tear easily and lose shape, reducing airflow.
Do not disturb fiberglass-lined ducts: brushing releases fibers that irritate lungs and skin.
Do not skip protective equipment: fine dust and allergens become airborne during cleaning.
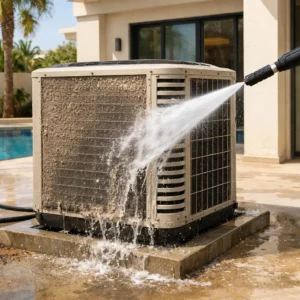
Do not spray liquids or disinfectants inside ducts: moisture promotes mold growth.
Do not assume visible cleanliness equals deep cleanliness: unseen contamination may remain.
How to Visually Verify Whether DIY Cleaning Worked
DIY duct cleaning should always be followed by simple verification.
- Use a flashlight or phone camera to inspect cleaned sections
- Check whether dust buildup has been visibly reduced
- Monitor airflow improvement at vents
- Observe whether dust accumulation in rooms slows over time
If dust reappears quickly or airflow remains weak, deeper contamination may exist beyond DIY reach.
DIY vs Professional Duct Cleaning: A Clear Decision Framework
Use the following framework to decide whether DIY is sufficient.
| Factor | DIY Suitable | Professional Recommended |
|---|---|---|
| Duct type | Rigid metal | Flexible or fiberglass-lined |
| Contamination level | Light surface dust | Heavy debris, mold, odors |
| Health concerns | No allergies | Allergies, asthma, children |
| Equipment capability | HEPA vacuum available | Truck-mounted negative pressure |
If your situation falls mostly in the professional column, DIY cleaning may provide limited benefit and delay proper resolution.
Why Professional Duct Cleaning Is Sometimes Necessary
Professional duct cleaning uses sealed negative-pressure systems that prevent dust escape while cleaning the entire network. This approach is especially important for:
- Homes after renovation or construction
- Persistent odors or mold suspicion
- Heavy dust accumulation throughout multiple rooms
- Systems serving sensitive occupants
You can review how professional AC duct cleaning is structured to understand when it offers clear advantages over DIY methods.
Post-Cleaning Actions for Long-Term Results
Duct cleaning should not be treated as a one-time fix.
- Replace filters regularly
- Keep return air intakes unobstructed
- Schedule periodic inspections
- Address moisture issues immediately
These steps protect airflow and hygiene between cleanings.
When Duct Cleaning Should Be Handled Properly
Duct contamination does not resolve on its own. When ignored, it can degrade indoor air quality, increase allergy risk, strain HVAC components, and reduce cooling efficiency. Bio On Air addresses these risks through professional duct inspection and cleaning using proper containment and hygiene standards. Acting early is a preventive decision that protects both health and system performance. If you want to discuss whether DIY cleaning is enough for your situation, you can use the WhatsApp or Call button at the top right of this page to speak with our team.
Conclusion
Understanding duct cleaning how to starts with realism. DIY cleaning plays a supportive role by removing surface dust near vents and maintaining airflow between professional services. However, it cannot replace deep cleaning for contaminated or complex duct systems. Knowing which sections are safe to clean, using the right tools, avoiding common mistakes, and verifying results protects your HVAC system and your health.
The most effective approach combines informed DIY maintenance with professional cleaning when conditions demand it. By shifting focus from one-time cleaning to long-term airflow protection and system hygiene, you achieve cleaner air, more stable cooling, and fewer HVAC issues over time.