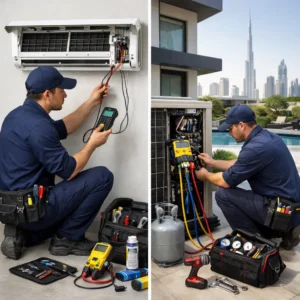
Blower cleaning is often ignored until airflow becomes weak, strange smells appear, or the AC starts vibrating more than usual. In many UAE homes and offices, the blower runs for long hours, collecting dust and debris inside its vanes. When the blower becomes dirty, cooling performance drops, energy use increases, and comfort decreases. This guide explains how to connect real symptoms to a dirty blower, how to inspect it safely, when DIY cleaning is reasonable, and when professional cleaning is the smarter choice.
Table of Contents
ToggleUnderstanding What the Blower Actually Does
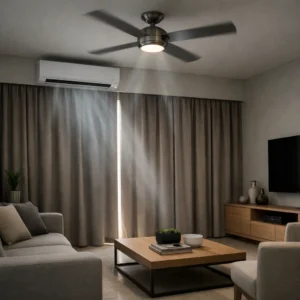
The blower is the heart of your indoor air movement. While the compressor handles cooling and the coil handles heat exchange, the blower is responsible for pushing conditioned air into your room. If the blower cannot spin freely or evenly, airflow suffers immediately.
In simple terms, the blower:
- Draws air through the return duct and filter
- Pushes air across the evaporator coil
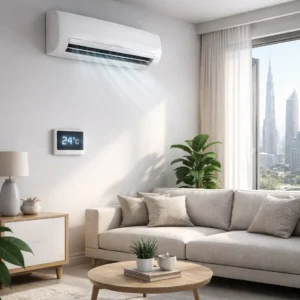
- Distributes cooled air back into your living space
When dust accumulates on blower vanes, the fan becomes heavier and unbalanced. This affects airflow volume, system efficiency, and mechanical stability.
Real Symptoms That Often Point to a Dirty Blower
Many people assume cooling problems are always related to refrigerant or compressor issues. However, a dirty blower can create symptoms that feel much more serious than they actually are.
1. Weak Airflow From Vents
If you notice reduced air pressure even though the AC sounds like it is running normally, the blower may be struggling to push air efficiently due to dust buildup inside the vanes.
2. Vibration or Wobbling Noise
Caked dust does not spread evenly. It creates imbalance. This imbalance can cause vibration, rattling, or a subtle wobbling sound during operation.
3. Higher Electricity Bills
When airflow is restricted, the system runs longer to achieve the same temperature. Longer runtime equals higher energy consumption.
4. Unpleasant Odors
Dust mixed with moisture can create musty smells. The blower continuously spreads that odor throughout the space.
5. Uneven Cooling Between Rooms
If some rooms feel cooler while others remain warm, poor air distribution caused by blower inefficiency may be involved.
Visual Inspection Guidance: How to Identify Dust Buildup
Before assuming major damage, you can perform a basic visual check. Safety always comes first.
Step 1: Shut Off Power Completely
Turn off the AC from the thermostat and switch off the breaker. Never inspect internal components while power is active.
Step 2: Locate the Indoor Unit Access Panel
For split systems, the blower is usually inside the indoor air handler. Access may require removing the front cover carefully.
Step 3: Use a Flashlight
Look inside the blower housing. Check the cylindrical fan wheel (often called the squirrel cage fan). Signs of heavy buildup include:
- Thick gray or black dust lining the vanes
- Sticky dirt accumulation inside blade curves
- Uneven patches of debris
If the vanes look clean and evenly spaced, cleaning may not be the primary issue.
Difficulty Levels: DIY Surface Cleaning vs Full Removal Cleaning
Not all blower cleaning tasks are equal. There are clear differences in complexity and risk.
Level 1: Simple Surface Cleaning (Low Difficulty)
This involves cleaning accessible dust without removing the blower assembly. Suitable when:
- Dust buildup is light
- No vibration is present
- Airflow reduction is minor
Tools may include a soft brush, microfiber cloth, and a low-pressure vacuum.
Level 2: Full Blower Removal Cleaning (High Difficulty)
This requires removing the blower assembly from the housing. Risks include:
- Electrical wiring damage
- Improper reconnection
- Capacitor shock risk
- Motor shaft misalignment
Capacitors can hold electrical charge even after shutdown. Mishandling can cause injury.
Structured Step Sequence for Safe Blower Cleaning
1. Complete Power Shutdown
Switch off the breaker. Confirm no power using appropriate tools if available.
2. Remove Access Panels Carefully
Keep screws organized. Avoid pulling panels aggressively.
3. Disconnect Wiring (Advanced Cleaning Only)
Take photos before disconnecting anything. This helps ensure correct reinstallation.
4. Access Blower Housing
Remove retaining brackets gently. Avoid bending the blower wheel.
5. Cleaning Tools
- Soft nylon brush
- Mild coil-safe cleaner
- Low-pressure compressed air
- Microfiber cloth
6. Clean Each Vane Thoroughly
Ensure dust is removed from inside curves. Uneven cleaning can still cause imbalance.
7. Inspect Motor Shaft and Tightening
Check that the motor shaft is firm. Loose set screws can cause wobbling.
8. Reinstallation Checks
Reconnect wiring properly. Secure brackets. Confirm free rotation before restoring power.
DIY Surface Cleaning vs Professional Deep Cleaning
| Factor | DIY Surface Cleaning | Professional Deep Cleaning |
|---|---|---|
| Time Required | 1–2 hours | 2–4 hours depending on system |
| Effectiveness | Moderate | High (internal and full removal cleaning) |
| Risk Level | Low to Medium | Low (handled by trained technicians) |
| Cost | Minimal tools cost | Typically AED 270–650 for full internal clean |
For deeper contamination cases, comprehensive cleaning and sanitization may range from AED 450–850 depending on system condition.
When Cleaning Will NOT Solve the Problem
Blower cleaning does not fix mechanical damage. If you hear grinding or metal scraping, it may indicate:
- Bearing failure
- Motor damage
- Loose mounting brackets
In these cases, cleaning alone will not eliminate the noise. Mechanical repair or component replacement may be required.
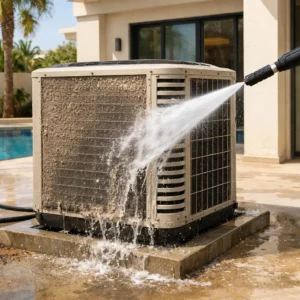
Preventive Strategies to Avoid Heavy Blower Contamination
Upgrade Air Filters
Using higher-quality filters reduces dust entering the blower.
Seal Cabinet Leaks
Air leaks pull unfiltered air directly into the blower housing.
Airflow Management
Ensure return vents are unobstructed to reduce strain.
Routine Maintenance Scheduling
Periodic inspection prevents heavy buildup that requires complex removal cleaning.
When Professional Help Is the Smarter Choice
If blower contamination is heavy, airflow is severely restricted, or vibration is noticeable, professional cleaning may prevent long-term motor damage. Bio On Air handles blower cleaning and deeper internal cleaning safely, ensuring electrical components are protected and airflow performance is restored.
Ignoring blower issues can lead to increased energy use, poor air quality, and eventual motor failure. Acting early is more cost-effective than waiting for component replacement.
Conclusion
Blower cleaning plays a critical role in airflow efficiency, comfort, and indoor air quality. While light surface cleaning may be manageable for some homeowners, heavy buildup, vibration, or internal contamination requires careful handling. Understanding the difference between cleaning and mechanical repair helps avoid misdiagnosis and unnecessary expense. With proper inspection, safe procedures, and preventive maintenance, your blower can operate smoothly, reduce energy use, and extend the lifespan of your AC system.