Trying ac installation diy in Dubai may seem like a cost-saving idea, but in reality, it involves technical, legal, and safety considerations. In the UAE, installing an AC system is not just about mounting units—it requires proper planning, compliance, and precise execution to ensure safety, efficiency, and long-term performance.
Table of Contents
ToggleIs AC Installation DIY Allowed in Dubai
Before starting any DIY AC installation, it is important to understand that Dubai has strict regulations related to electrical systems, refrigerant handling, and building safety.
Authorities such as DEWA (Dubai Electricity and Water Authority) and municipality guidelines require that:
- Electrical connections follow approved standards
- Load capacity is properly calculated
- Installations do not compromise building safety
While small DIY attempts may not always be directly penalized, improper installation can lead to serious consequences, especially in apartments or shared buildings.
Warranty Risks of DIY AC Installation
One of the biggest hidden risks is warranty loss.
Most AC brands clearly state:
- Installation must be done by certified technicians
- Improper installation voids warranty coverage
- Refrigerant handling must follow professional standards
This means if something fails later—even if unrelated—you may not be eligible for support.
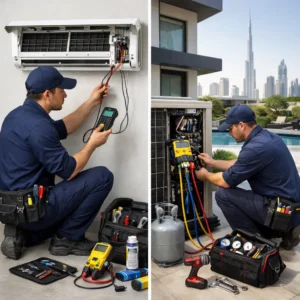
Tools and Equipment Required for DIY Installation
AC installation is not a basic household task. It requires specialized tools that are not commonly available.
- Vacuum pump (for removing air and moisture)
- Manifold gauge set (for pressure measurement)
- Torque wrench (for precise tightening)
- Flaring tool (for pipe connection)
- Drill with core bit (for wall penetration)
- Level tool (for proper alignment)
Without these tools, installation quality can be compromised.
Pre-Installation Planning
BTU Sizing for UAE Conditions
Choosing the right capacity is critical. In Dubai, cooling demand is higher due to extreme heat.
General guide:
- Small room (10–15 m²): 9,000 BTU
- Medium room (15–25 m²): 12,000 BTU
- Large room (25–40 m²): 18,000 BTU
However, UAE conditions often require slightly higher capacity due to heat load and insulation factors.
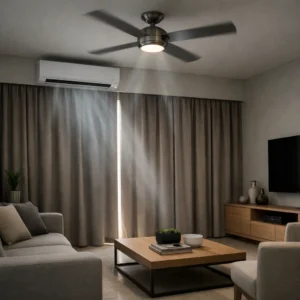
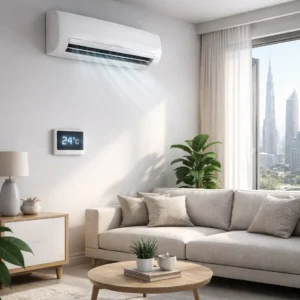
Choosing the Right Location
- Indoor unit should be 2–2.5 meters above floor
- Avoid direct sunlight exposure
- Ensure proper airflow distribution
- Outdoor unit should be well-ventilated
Electrical Requirements
AC systems require dedicated circuits to prevent overload.
- Separate breaker for AC unit
- Proper voltage compatibility (typically 220–240V)
- Safe wiring installation
Step-by-Step AC Installation Process
1. Installing the Indoor Unit
- Mount the wall bracket securely
- Ensure level alignment
- Drill a hole (usually 65–75 mm) for piping
- Route pipes, wiring, and drain hose
2. Installing the Outdoor Unit
- Place on a stable base or bracket
- Ensure proper clearance for airflow
- Avoid heat traps or enclosed spaces
3. Connecting Refrigerant Pipes
This step requires precision. Pipes must be flared properly to avoid leaks.
- Cut pipes cleanly
- Use flaring tool correctly
- Tighten with torque wrench
4. Drainage Setup
Drain pipes must slope downward to avoid water accumulation.
- No upward bends
- Proper slope for gravity flow
- Secure connection to avoid leaks
5. Electrical Connection
- Follow manufacturer wiring diagram
- Ensure proper grounding
- Use correct cable size
Critical Technical Procedures (Most DIY Fail Here)
Vacuuming the System
This removes air and moisture from the refrigerant lines.
Without vacuuming:
- Cooling efficiency drops
- Compressor damage risk increases
Leak Testing
Proper leak testing ensures system integrity.
- Use pressure testing tools
- Check all joints and connections
Gas Charging and Pressure Check
Incorrect refrigerant levels can cause system failure.
This step usually requires professional tools and knowledge.
Commissioning and Performance Check
After installation, the system must be tested.
- Check airflow strength
- Measure cooling performance
- Monitor system pressure
- Ensure no unusual noise
This step confirms whether installation was successful.
Common DIY Mistakes in UAE Conditions
- Undersized AC unit for high heat load
- Incorrect pipe insulation leading to condensation
- Poor drainage causing water leakage
- Skipping vacuum process
- Improper electrical connections
These mistakes often result in higher long-term costs.
DIY vs Professional AC Installation Cost in Dubai
| Category | DIY | Professional |
|---|---|---|
| Initial Cost | AED 200 – 800 (tools, materials) | AED 500 – 1,500+ |
| Risk Level | High | Low |
| Warranty | Voided | Maintained |
| Efficiency | Uncertain | Optimized |
Note: DIY costs exclude potential repair expenses due to incorrect installation. Professional costs vary depending on unit type and installation complexity.
When DIY May Be Acceptable
- Basic understanding of HVAC systems
- Access to proper tools
- Non-critical installations
Even in these cases, risks remain.
When You Should Hire Professionals
- Apartment installations
- Central AC systems
- Electrical modifications required
- Warranty-sensitive installations
In most UAE scenarios, professional installation is safer and more reliable.
If you are considering DIY AC installation, it is important to weigh the risks carefully. Improper installation can reduce cooling efficiency, increase electricity usage, and lead to long-term system damage. In some cases, it may also affect indoor air quality and safety. Addressing installation correctly from the beginning helps avoid repeated adjustments and costly repairs later. If you need clarity about installation requirements or system setup, you can use the WhatsApp or Call button on the top right to connect with the Bio On Air team and understand the most suitable approach for your situation.
Conclusion
While ac installation diy may seem possible, it involves technical precision, safety considerations, and regulatory awareness. In Dubai’s demanding environment, professional installation is often the more reliable and cost-effective option for long-term performance and system safety.