ac fitting in wall refers to installing an air conditioning unit directly through a wall opening instead of placing it in a window or mounting it as a split system. This approach is often chosen for rooms without suitable windows, for better security, or for cleaner interior layout—but it comes with technical, structural, and safety considerations that must be understood before installation.
Table of Contents
ToggleWhat AC Fitting in Wall Really Means
At a basic level, ac fitting in wall means creating a permanent opening in a wall so an AC unit can sit partially inside the room and partially outside. Unlike window installation, the wall becomes part of the AC’s structure, airflow path, and load support.
This method is commonly used in apartments, older buildings, offices, and rooms where window installation is not possible or not allowed. However, not all AC units are designed for wall installation, and not all walls are suitable for cutting.
Understanding what type of unit is being installed—and how it is designed to vent heat and manage weight—is the first step to avoiding long-term problems.
AC Fitting in Wall vs Window Units
One of the most common mistakes people make is assuming that any window AC can simply be placed into a wall. While some units look similar, their design intent can be very different.
Window AC Units
Window units are designed to sit on a window sill and be supported by the window frame and external brackets. Their chassis often relies on downward support from below and side support from the window structure.
Key characteristics of window units include:
- Rear and side ventilation designed for open air around the unit
- Weight distribution intended for sill support
- No dedicated wall sleeve in many models
Installing a standard window unit directly into a wall without modification can block ventilation, trap heat, or place stress on the unit’s frame.
Through-the-Wall AC Units
Through-the-wall units are specifically engineered for ac fitting in wall. They use a metal sleeve that passes through the wall and supports the unit evenly.
Typical features include:
- Ventilation designed only at the rear
- Chassis built to slide into a wall sleeve
- Even weight distribution across the wall opening
This distinction is critical. Using the wrong unit type can reduce efficiency, shorten lifespan, and increase the risk of water leaks and wall damage.
Venting Direction and Heat Exhaust Considerations
AC units remove heat from inside the room and release it outside. How and where that heat exits is a key design factor in ac fitting in wall.
Window units often vent heat from the back and sides. When placed into a wall, side vents may be blocked by masonry or framing, causing heat buildup inside the unit.
Through-the-wall units are designed to vent exclusively through the rear. This makes them safer and more efficient when surrounded by solid wall material.
Improper venting can lead to:
- Reduced cooling performance
- Overheating of internal components
- Shortened compressor life
Before installation, the unit’s venting layout must match the wall configuration exactly.
Chassis Design and Sleeve Requirements
The sleeve is one of the most important components in ac fitting in wall. It is the metal frame that lines the wall opening and supports the AC unit.
A proper sleeve:
- Distributes the unit’s weight evenly
- Creates a sealed barrier between indoors and outdoors
- Allows controlled drainage of condensation
Some people attempt to skip the sleeve or reuse makeshift framing. This often leads to vibration, noise, air leakage, and water intrusion.
Using a sleeve that matches the AC manufacturer’s specifications is essential for long-term performance and safety.
Wall Type Identification Before Installation
Not all walls can be cut safely. One of the biggest risks in ac fitting in wall is cutting into the wrong wall type.
Walls generally fall into these categories:
- Drywall with metal or wooden studs
- Concrete or reinforced concrete
- Brick or block masonry
- Load-bearing structural walls
Cutting into a load-bearing wall without proper assessment can compromise building integrity. In apartments and commercial buildings, this may also violate building regulations.
Professional assessment helps identify whether reinforcement or an alternative placement is required.
Load-Bearing Risks and Structural Safety
AC units are heavy. When installed through a wall, that weight must be supported continuously—not just during installation.
Structural risks include:
- Wall cracking over time
- Frame deformation
- Gradual sagging that affects drainage angle
Support framing inside the wall opening helps transfer load safely. This is especially important for masonry and drywall walls.
Skipping proper support may not cause immediate failure, but it often leads to long-term damage that is costly to repair.
Electrical Capacity and Power Safety
Another overlooked factor in ac fitting in wall is electrical readiness. Wall-mounted AC units often draw significant current, especially during startup.
Before installation, electrical checks should confirm:
- Dedicated circuit availability
- Correct voltage and breaker rating
- Proper grounding
Overloading an existing circuit can cause frequent tripping, overheating wires, or long-term electrical hazards.
Professional installers verify electrical compatibility before mounting the unit permanently.
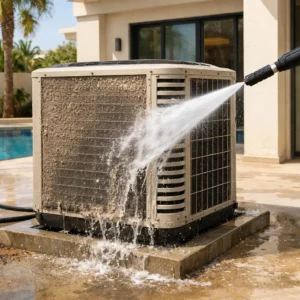
Drainage Angle and Moisture Control
Every AC produces condensation. In ac fitting in wall, managing this moisture correctly is critical.
The unit must be installed with a slight outward tilt so water drains outside, not back into the room or wall cavity.
Improper drainage can result in:
- Water stains on interior walls
- Mold growth inside the wall
- Damage to insulation and framing
Sealing around the sleeve with moisture-resistant materials helps protect both the wall and indoor air quality.
End-to-End Installation Flow
Understanding the full installation process helps set realistic expectations for effort, time, and risk.
Wall Cutting and Opening Preparation
The process begins by marking and cutting the wall opening to precise dimensions. Accuracy is essential to ensure the sleeve fits tightly.
Framing the Rough Opening
Internal framing reinforces the opening and distributes weight. This step is critical for drywall and non-solid walls.
Installing and Sealing the Sleeve
The sleeve is inserted, leveled with proper tilt, and sealed to prevent air and water leaks.
Sliding and Securing the Unit
The AC unit slides into the sleeve and is secured according to manufacturer guidelines.
Interior Finishing
Trim, panels, or finishing frames are added to create a clean interior appearance and protect edges.
DIY vs Professional Installation
Many people consider DIY installation to save money. However, ac fitting in wall is one of the more complex AC installation types.
DIY Installation
DIY may be feasible if you have:
- Experience with wall cutting and framing
- Proper tools for masonry or drywall work
- Understanding of electrical and drainage requirements
The risks include wall damage, improper sealing, poor drainage, and safety issues. Time commitment is also significant.
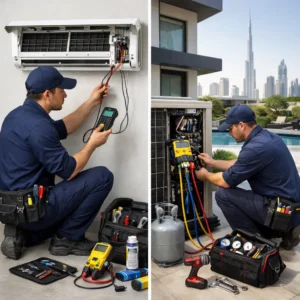
Professional Installation
Professional installation reduces risk exposure. Installers assess wall type, structural needs, electrical capacity, and sealing requirements before proceeding.
Rather than listing prices, it is more useful to understand that professional cost depends on wall type, unit size, complexity of cutting, electrical work required, and finishing expectations. More complex walls and heavier units require more labor and safety measures.
For structured and safe installation, many people rely on professional AC installation and replacement services to avoid long-term issues.
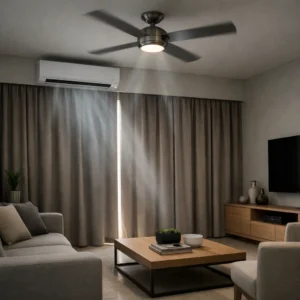
Aesthetic and Placement Considerations
Beyond function, ac fitting in wall affects how a room looks and feels.
Important considerations include:
- Trim and cover solutions that blend with interior design
- Placement height for balanced airflow
- Clear access for filter cleaning and servicing
Poor placement can cause uneven cooling, noise discomfort, or difficult maintenance access.
Common Mistakes to Avoid
Many long-term problems come from early mistakes.
- Using window units without proper wall sleeves
- Blocking ventilation paths
- Skipping structural reinforcement
- Ignoring drainage slope
- Poor sealing that allows moisture intrusion
These mistakes often lead to reduced efficiency, wall damage, water leaks, and shortened unit lifespan.
When Professional Handling Becomes the Safer Choice
AC fitting in wall combines structural work, electrical safety, moisture control, and mechanical installation. When any of these are handled incorrectly, the cost of fixing mistakes often exceeds the cost of doing it right the first time.
Bio On Air supports safe and informed AC installation by assessing wall conditions, explaining feasible options, and ensuring the installation does not compromise comfort, efficiency, or safety. Acting carefully at the installation stage prevents many future repair issues.
If you want to clarify whether your wall and AC unit are suitable for through-the-wall installation, you can use the WhatsApp or Call button at the top right of this page to discuss your situation with our team.
Conclusion
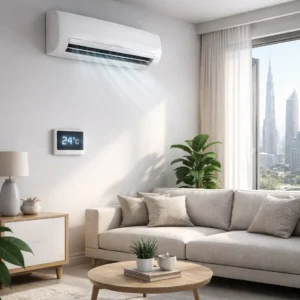
ac fitting in wall can be an effective solution when window installation is not practical, but it requires careful planning and execution. Understanding the difference between window and through-the-wall units, assessing wall structure, managing ventilation and drainage, and considering long-term maintenance are all essential.
When done correctly, wall-fitted AC offers stable cooling, cleaner aesthetics, and reliable performance. When done poorly, it can lead to structural damage, moisture problems, and repeated costs. Taking time to evaluate the wall, unit design, and installation approach helps protect both your space and your investment for years to come.