If you are dealing with ac leaking, the first feeling is usually panic. You may see water dripping from the indoor unit, stains forming on the ceiling, or puddles near the AC. In the UAE’s climate, AC runs for long hours, so even a small leak can quickly become a bigger issue. The good news is that most AC leaks follow predictable patterns. With calm steps and the right checks, you can reduce damage immediately and decide logically whether it is safe to handle yourself or time to call a professional.
Table of Contents
ToggleImmediate Emergency Step: Shut the System Off First
Before diagnosing anything, the most important step when you notice ac leaking is to switch the system off.
This is not an overreaction. Turning the AC off immediately helps prevent:
- Water spreading into walls or ceiling cavities
- Electrical exposure or short circuits
- Further freezing and rapid ice melt
- Damage to surrounding furniture or flooring
If water is dripping near light fixtures or electrical outlets, turn off the AC from the thermostat and, if necessary, switch off the AC breaker. Safety comes first. Water and electricity should never mix.
Once the unit is off, you can begin calmly identifying where the leak is coming from.
Quick Diagnostic Flow: Identify the Leak Location
Understanding where the water appears gives strong clues about the cause. Here is a logical flow to help you narrow it down.
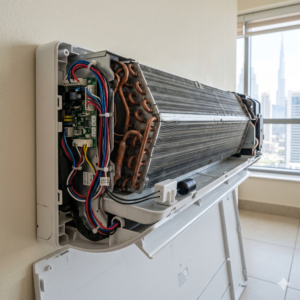
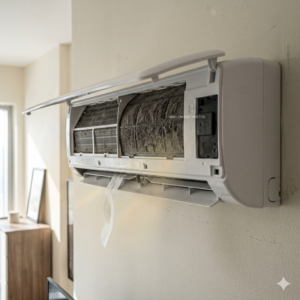
Leak Inside the Indoor Unit (Wall-Mounted Split AC)
If water is dripping from the front panel or bottom of the indoor unit, the issue is usually related to drainage or airflow restriction.
Common causes include:
- Clogged condensate drain line
- Frozen evaporator coil melting rapidly
- Dirty air filter blocking airflow
- Cracked or rusted drain pan
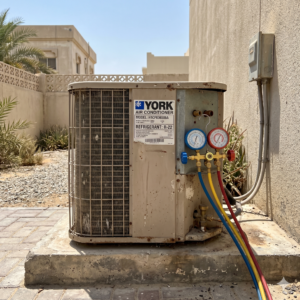
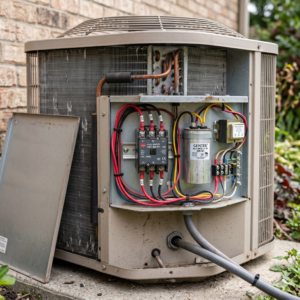
Water Around the Outdoor Condenser
If you see water near the outdoor unit, this is often normal condensation, especially in humid weather. However, if the water flow is excessive or continuous, it may indicate frozen coil thawing or refrigerant-related issues.
Water Dripping from Ceiling
If you notice water stains or dripping from the ceiling, especially in ducted systems, this usually means:
- Clogged primary drain line
- Secondary drain overflow
- Blocked or disconnected drain pipe
This type of leak can cause structural damage quickly and should not be ignored.
Leak Near Furnace or Air Handler Area
In central systems, water near the air handler often relates to drain blockage, cracked drain pan, or improper slope in drainage piping.
Leak from Secondary Drain Outlet
Some systems have a secondary drain line designed to signal blockage. If water comes from this line, it means the primary drain is clogged and needs attention immediately.
Most Common Causes of AC Leaking Explained Clearly
Now that you know where the leak appears, let us understand the most common root causes.
1. Clogged Condensate Drain Line
This is the most common cause of ac leaking. Your AC removes moisture from the air during cooling. That moisture drains through a pipe. Over time, dust, algae, and debris build up inside this pipe.
When the pipe is blocked, water backs up and overflows from the drain pan.
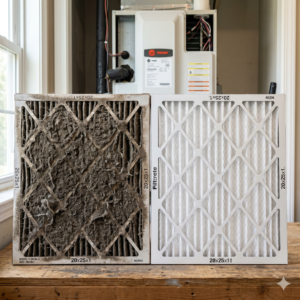
2. Dirty Air Filter Causing Frozen Coil
A clogged air filter restricts airflow. When airflow drops, the evaporator coil becomes too cold and freezes. Ice forms on the coil. When the system is turned off or the ice melts, large amounts of water drip out suddenly.
This often surprises homeowners because the leak appears suddenly after the AC was running normally.
3. Cracked or Rusted Drain Pan
Older systems may have metal drain pans that rust over time. Small cracks allow water to drip even if the drain line is clear.
4. Low Refrigerant
Low refrigerant changes pressure inside the system, which can cause the evaporator coil to freeze. Frozen coils then melt and create leakage.
Low refrigerant is not something you refill casually. It usually indicates a leak in the system and requires professional diagnosis.
5. Frozen Evaporator Coil Behavior
When a coil freezes due to airflow issues or refrigerant imbalance, the leak may appear only after the ice melts. The pattern is often: weak cooling → ice formation → AC turned off → sudden water leakage.
Simple DIY Inspection Path (Safe Steps Only)
If the situation is not electrical and no major ceiling damage is visible, you can follow these safe checks.
Step 1: Check the Air Filter
Remove the filter and inspect it against light. If you cannot see light through it, it is too dirty. Clean or replace it.
After replacing, leave the AC off for several hours to allow any frozen coil to fully thaw before restarting.
Step 2: Look for Visible Drain Blockage
Find the PVC drain pipe outside your home. If you see little or no dripping while the AC is running normally, it may be clogged.
Step 3: Safe Thawing Process
If you suspect a frozen coil:
- Turn off cooling mode
- Switch fan mode on (if possible)
- Wait several hours
Never chip away ice manually. This can damage the coil.
Step 4: Wet-Vac Method for Clearing Outside PVC Drain
You can use a wet vacuum at the outdoor drain pipe opening:
- Attach vacuum hose tightly to pipe
- Run vacuum for 1–2 minutes
- Check if debris and water are removed
This often clears minor clogs safely.
When to Handle It Yourself vs When to Call a Professional
Here is a clear decision guide.
You Can Try DIY If:
- Leak started recently
- Filter is visibly dirty
- No ceiling damage is present
- No electrical exposure
Call a Professional If:
- Leak continues after filter replacement
- Water appears from ceiling or inside walls
- You suspect refrigerant problems
- The coil repeatedly freezes
- There is visible rust or cracked drain pan
- Electrical components are wet
Refrigerant issues, electrical exposure, and structural water damage require professional handling. Attempting DIY in these cases can worsen the problem and increase repair costs.
What Professional Service Typically Covers
When professional intervention is required, service may include:
- Drain line clearing and flushing
- Coil inspection and cleaning
- Drain pan replacement if damaged
- Refrigerant leak detection and repair
- Full airflow evaluation
Pricing depends on the root cause and repair scope. Minor drain cleaning is typically more affordable than refrigerant leak repair or component replacement. The cost is determined after inspection and confirmed before work begins. This ensures transparency and prevents unexpected charges.
Prevention Steps to Avoid Future Overflow
Routine Drain Flushing
Flushing the condensate line periodically helps prevent algae buildup.
Filter Replacement Schedule
Replace or clean filters every 1–3 months depending on usage and dust levels.
Maintain Proper Airflow
Ensure vents are not blocked by furniture or curtains.
Periodic Inspection
Professional inspection before peak summer can catch early warning signs before leaks begin.
Calm Guidance: From Panic to Clear Action
Seeing water from your AC can feel alarming. But most AC leaks follow predictable causes. Start by turning the system off. Identify the leak location. Perform safe checks. If the issue goes beyond basic blockage or filter replacement, professional diagnosis prevents further damage.
AC leaking does not automatically mean major repair. It often signals a drainage or airflow issue that can be addressed quickly when handled correctly.
When AC Leaking Should Be Addressed Properly
If AC leaking is ignored, it can lead to mold growth, ceiling damage, electrical hazards, higher energy bills, and system deterioration. Bio On Air helps manage these risks through proper inspection, safe repair methods, and clear communication so you understand exactly what is happening. Acting early prevents structural damage and costly component failure. If you are unsure about the severity of your leak, you can use the WhatsApp or Call button at the top right of this page to discuss your situation with our team.
Conclusion
AC leaking can be stressful, but it is usually manageable when approached logically. Shut the system off first. Identify the leak location. Check filters and drains safely. Understand the most common causes. Know when DIY is appropriate and when professional support is necessary. With the right steps, you can prevent worsening damage, protect indoor air quality, and restore your AC system safely and efficiently.