Window AC unit cleaning is often ignored until bad odors, weak airflow, water leakage, or rising electricity bills become noticeable. In hot climates where window units run for long hours, internal dust mixed with condensation can form sticky bio-slime inside coils and drain areas. Cleaning is not only about appearance — it directly affects cooling efficiency, indoor air quality, and long-term performance.
Table of Contents
ToggleWhy Window AC Unit Cleaning Becomes Necessary
Many users assume that if cold air still comes out, the window AC is fine. However, performance decline usually starts gradually. Reduced airflow, musty smells, or increased power consumption are early warning signs.
Here are the most common issues that signal cleaning is overdue:
- Bad odors: caused by mold, mildew, and bacteria growing in moist coil surfaces.
- Reduced airflow: dust buildup blocks air passages and filters.
- Water leakage: clogged drain pans and drain plugs prevent proper water discharge.
- Higher electricity usage: the unit works harder when coils cannot exchange heat efficiently.
If ignored, these problems not only affect comfort but can shorten the lifespan of the unit.
Understanding Internal Buildup: Dust + Condensation = Bio-Slime
Inside every window AC unit, two main conditions exist: airflow carrying dust particles and moisture produced by condensation. When dust settles on wet coil surfaces, it combines with moisture and microorganisms to form a sticky layer often referred to as bio-slime.
This buildup typically forms in:
- Evaporator coils
- Drain pan and drain plug area
- Blower fan housing
Over time, this layer restricts airflow, reduces heat exchange efficiency, and creates an environment where mold and mildew thrive. This is why odor and cooling performance issues often appear together.
Complete Preparation Checklist Before Cleaning
Before starting any window AC unit cleaning process, preparation is critical. Cleaning without proper setup can damage components or create safety risks.
Essential preparation steps:
- Disconnect power completely from the electrical source.
- Wear gloves and protective eyewear.
- Prepare soft brushes, microfiber cloths, and a coil-safe cleaning solution.
- Keep a vacuum cleaner with a soft brush attachment.
- Have clean water for rinsing filters.
- Use a fin comb if available (for gentle fin straightening).
Exact costs of tools or cleaning materials may vary depending on quality and availability. It is always better to choose coil-safe and non-corrosive solutions rather than generic harsh chemicals.
Structured Deep-Clean Sequence
Step 1: Safe Power Disconnection
Always unplug the unit or switch off the dedicated circuit breaker. This prevents electrical hazards while handling internal components.
Step 2: Remove the Front Casing Carefully
Most window AC units allow front panel removal using simple screws or clips. Avoid forcing plastic panels, as they may crack easily.
Step 3: Filter Cleaning — Rinse vs Deep Wash
Filters should be removed first.
- Light dirt: rinse gently under running water and air-dry completely.
- Heavy dirt or grease: wash with mild soap solution, rinse thoroughly, and dry before reinstalling.
Never reinstall a wet filter. Moisture can accelerate mold growth inside the unit.
Step 4: Evaporator Coil Cleaning (Indoor Side)
Use a soft brush or vacuum to remove surface dust. Apply a coil-safe cleaner lightly and allow it to break down grime. Avoid high-pressure spraying, which can bend delicate aluminum fins.
If fins are slightly bent, use a fin comb gently to restore alignment. Bent fins reduce airflow and cooling efficiency.
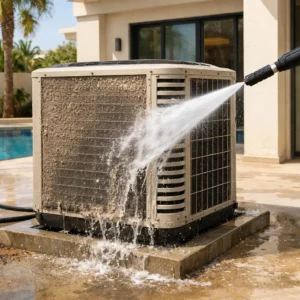
Step 5: Condenser Coil Cleaning (Outdoor Side)
The condenser coil faces outside and often accumulates heavier dust. Use a brush or vacuum carefully. Avoid excessive water pressure that could damage internal electrical components.
Step 6: Drain Pan and Drain Plug Cleaning
This area is a common source of odor and leakage. Remove visible sludge and clean gently using a non-corrosive solution. Ensure the drain plug is unclogged so condensation can flow freely.
Step 7: Blower Fan and Housing Cleaning
If accessible, wipe dust buildup from the blower fan. Excessive buildup reduces airflow and causes vibration.
Odor Treatment and Mold Control
If bad odor persists, mold and mildew are likely present. Addressing odor requires both cleaning and drying.
Recommended steps:
- Use mild anti-microbial cleaning solutions safe for AC coils.
- Allow proper drying before reassembly.
- Ensure airflow passages are completely dry to prevent regrowth.
Avoid bleach or strong corrosive chemicals. They may damage coil surfaces and produce harmful fumes.
Common Mistakes to Avoid
- Using high-pressure water directly on coils.
- Bending or flattening coil fins.
- Skipping full drying before reassembly.
- Using strong chemical cleaners not designed for AC systems.
- Forcing parts during casing removal.
These mistakes often lead to more expensive repairs than the original cleaning problem.
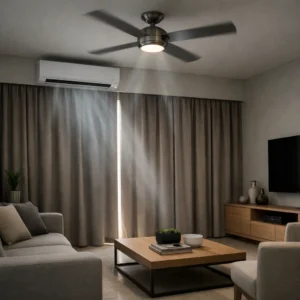
Preventive Maintenance Strategies
Maintaining airflow and moisture control is the key to reducing deep cleaning frequency.
- Keep windows and surrounding areas clean to reduce dust intake.
- Ensure proper room ventilation to limit excess humidity.
- Do not block airflow with curtains or furniture.
Airflow preservation helps the system operate efficiently with less strain.
Recommended Recurring Maintenance Schedule
- Filter cleaning: every 2–4 weeks during heavy use.
- Seasonal wipe-down: at the start and end of summer.
- Annual coil cleaning: once per year for moderate usage, twice if heavily used.
- Drain inspection: every 3–6 months.
Following a schedule significantly reduces odor formation and airflow restriction.
Off-Season Storage and Winterization Practices
If the window AC unit is removed during cooler months, proper storage protects internal components.
- Clean thoroughly before storage.
- Store upright to protect compressor oil balance.
- Cover with breathable protective material to prevent dust accumulation.
- Avoid damp storage locations to prevent rust formation.
Before reinstalling next season, inspect for dust, corrosion, or pest intrusion.
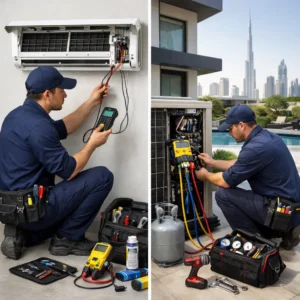
When Professional Cleaning Is Recommended
If odor persists after cleaning, airflow remains weak, or leakage continues, internal components may require deeper professional servicing. In some cases, internal electrical parts or sealed components must be inspected carefully.
Professional window AC unit cleaning ensures safe handling of coils, electrical systems, and drainage components without causing damage.
Conclusion
Window AC unit cleaning is more than routine maintenance — it directly impacts cooling efficiency, indoor air quality, and system lifespan. Addressing dust buildup, bio-slime formation, airflow restriction, and drainage blockage early prevents larger performance issues later. By following a structured cleaning sequence, avoiding common mistakes, and maintaining a regular schedule, you protect both comfort and long-term energy efficiency. Proper storage during off-season and timely professional assistance when needed ensure your window AC continues to perform reliably year after year.