When people ask how long does ac installation take, what they really want to know is how much disruption to expect and whether the job will be done properly. In general, a simple same-day AC replacement can take a few hours, while a full system installation may take one or several days, depending on site conditions, system type, and preparation.
Table of Contents
ToggleBaseline Timeframe: Same-Day Change-Out vs Full Installation
Before going into details, it helps to set a realistic baseline. Not all AC installations are equal, and the timeline depends heavily on the scope of work.
- Same-day change-out: Replacing an existing AC unit with a similar type and capacity usually takes between 4 to 8 hours.
- Full system installation: Installing a new AC system from scratch or upgrading to a different system type can take 1 to 3 days or more.
This difference matters because many delays are not caused by inefficiency, but by necessary steps that ensure safety, performance, and long-term reliability. Understanding what stretches or shortens the timeline helps you plan better and avoid rushed decisions.
Key Factors That Affect How Long AC Installation Takes
Unit Location and Accessibility
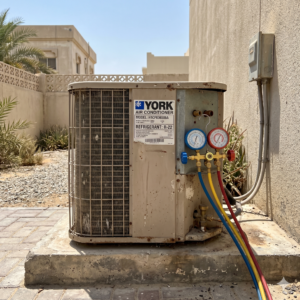
One of the biggest variables is where the AC unit is installed. Units mounted in easily accessible locations are quicker to install than those placed in tight ceilings, high walls, rooftops, or confined service shafts.
For example, installing an indoor unit in a clear wall area with direct access to piping routes is much faster than working inside a ceiling with limited clearance. Outdoor units placed on rooftops or balconies may also require additional time for safe handling and positioning.
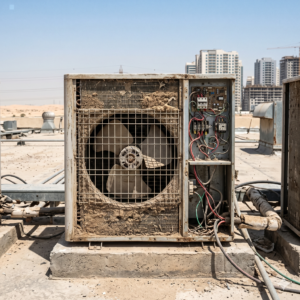
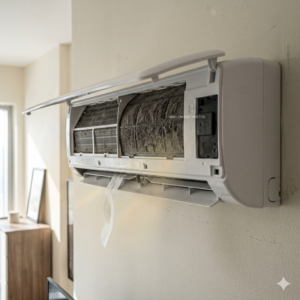
Removal of Old Equipment
If an old system needs to be removed, the process takes longer. Dismantling old units, disconnecting electrical wiring, recovering refrigerant safely, and clearing mounting brackets all add time.
Older systems may also have outdated piping or wiring that cannot be reused, which leads to additional preparation work.
Hidden Site Conditions
Some issues only become visible once work begins. These include:
- Damaged or corroded piping
- Blocked or improperly sloped drain lines
- Inadequate electrical capacity
- Previous installation shortcuts
Addressing these hidden issues is essential, even though it may extend installation time. Skipping them often results in leaks, electrical faults, or performance problems later.
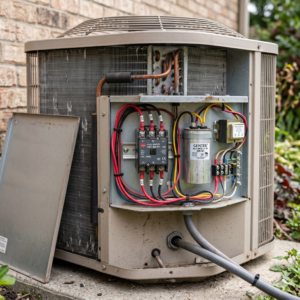
Electrical and Refrigerant Compatibility
AC systems must match the electrical supply and refrigerant type used in the property. If the new unit requires electrical upgrades or a different refrigerant standard, additional work is needed.
This includes modifying wiring, upgrading breakers, or flushing old refrigerant lines. These steps cannot be rushed without risking safety and efficiency.
Crew Size and Experience
The number of technicians and their experience level also affects duration. A well-coordinated crew can complete tasks efficiently without cutting corners. However, more people does not always mean faster work if the space is limited or tasks require careful sequencing.
Step-by-Step AC Installation Flow
Understanding the installation flow helps you visualize what happens while your AC is off and why certain steps take time.
Preparation and Site Assessment
The process begins with confirming measurements, checking access routes, protecting floors and furniture, and preparing tools and materials. This stage ensures the installation area is safe and organized.
Removal of Old Units (If Applicable)
Existing indoor and outdoor units are disconnected, refrigerant is recovered safely, and old mounting hardware is removed. This step must be done carefully to avoid damage to walls, ceilings, or wiring.
Placement and Mounting of New Units
New indoor and outdoor units are positioned and secured. Proper leveling and spacing are critical for drainage, airflow, and vibration control.
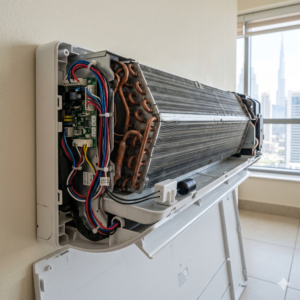
Piping, Wiring, and Drain Connections
Refrigerant lines, electrical cables, and drain pipes are connected. Correct insulation, routing, and sealing are essential to prevent leaks, condensation, and energy loss.
Evacuation, Charging, and Testing
The system is evacuated to remove moisture and air, then charged with refrigerant according to manufacturer specifications. Pressure testing and leak checks are performed to ensure system integrity.
Final Commissioning and Performance Check
The AC is powered on, airflow and temperature are checked, controls are tested, and noise or vibration issues are addressed. This step confirms that the system operates as intended.
Why Faster Is Not Always Better
Many homeowners worry when installation takes longer than expected. However, speed should never come at the expense of critical procedures.
Steps that cannot be rushed include:
- Proper evacuation to remove moisture
- Accurate refrigerant charging
- Electrical safety checks
- Drainage slope verification
Skipping or rushing these steps can lead to reduced cooling efficiency, higher energy bills, premature component failure, and even safety hazards. A slightly longer installation often means better long-term performance.
Practical Planning Tips for Homeowners
Prepare for Indoor Comfort During Downtime
Plan alternative cooling methods such as fans or temporary relocation during peak heat hours. Keeping windows shaded and reducing indoor heat sources helps maintain comfort.
Consider Pets and Children
Installation involves noise, tools, and open access areas. Make arrangements to keep pets and children away from the work zone for safety and comfort.
Clear the Work Area
Removing furniture, decorations, or obstacles near installation points saves time and reduces risk of damage.
Plan for Noise and Schedule Accordingly
AC installation can be noisy. Scheduling work during suitable hours helps minimize disruption, especially in shared buildings.
Pre-Installation Questions to Ask
- What is the expected installation duration for my specific setup?
- Will existing piping and wiring be reused or replaced?
- What steps are included in testing and commissioning?
- How will indoor areas be protected during work?
- Who should I contact if adjustments are needed after installation?
Signs of Proper vs Rushed Installation
Proper installation usually shows clean pipe insulation, secure mounting, quiet operation, and stable airflow. The technician explains system operation and answers questions.
Rushed installation may result in exposed wiring, noisy units, water leakage, or unclear instructions. These are warning signs that important steps may have been skipped.
When Professional Installation Matters
AC installation affects not only comfort but also energy efficiency and indoor air quality. Professional handling ensures correct sizing, safe connections, and long-term reliability. If you want to understand how installation and replacement are handled in detail, you can review our AC installation and replacement service for a clear overview of the process.
When Installation Details Should Be Confirmed Early
Installation timelines can change based on site conditions and system requirements. Confirming details early helps avoid surprises and ensures the work proceeds smoothly. Discuss access, electrical readiness, and expected downtime before installation begins.
Conclusion
So, how long does ac installation take? The answer depends on whether you are replacing an existing unit or installing a full system, as well as on access, site conditions, and system compatibility. While same-day change-outs are possible, multi-day installations are sometimes necessary to ensure safety and performance.
Understanding the process helps set realistic expectations and reduces stress during installation. A careful, well-paced installation protects your investment, improves comfort, and prevents long-term issues. Taking the time to plan, ask the right questions, and choose experienced professionals ensures your new AC system performs reliably when you need it most.